Learn how to manage kits, bundles and shadow listings in Jazva.
Contents:
- Overview
- Creating a New Kit
- Converting a Product Copy Into a Kit
- Editing an Existing Kit
- Swapping Kit Components in Bulk
Overview
In Jazva, a kit is any virtual product that can be sold as a separate listing online. A bundle is a type of kit that comprises more than 1 item from your warehouse.
Jazva’s kitting functionality allows you to create and manage kits using existing inventory. The inventory of each item in the kit is managed independently, giving you the flexibility to sell products as kits or individual products based on demand.
A shadow listing is a type of kit that “shadows” a listing from your other store or channel. By creating a shadow listing, you can maintain different product details, such as description and title, while using the same inventory count in Jazva. Shadow listings let you assign multiple product profiles to a single product SKU, while still ensuring that your inventory is in sync and accurate.
Let’s say you want to use a different title and description for a product on WooCommerce than that on eBay. Jazva lets you maintain 2 kits (one listed on Woo, and the other on eBay), and both will be linked to the same inventory.
There are two ways to create kits: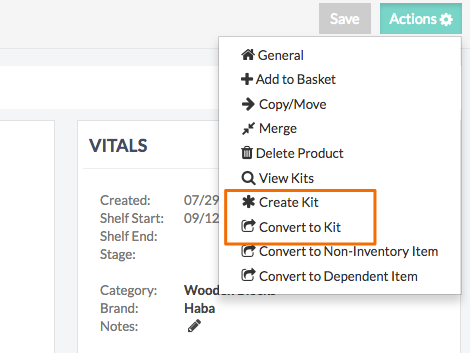
- You can select “Create Kit” from a product page to create a new kit. The item will automatically be added to the new kit, and you can add more items to turn it into a bundle.
- You can select “Convert to Kit” to convert the item into a kit of another item.
Kits should only be created from actual products. Kits should not be created from other kits.
Also, make sure that each kit's titles and descriptions are different, to make it easier to distinguish between one kit from another product.
Certain channels, such as eBay, have policies that do not allow you to have duplicate auctions or listings. Please take note of this when creating or converting kits.
Creating a New Kit
The easiest way to create a kit is from the product admin page.
- Open a product you would like to add to a new kit.
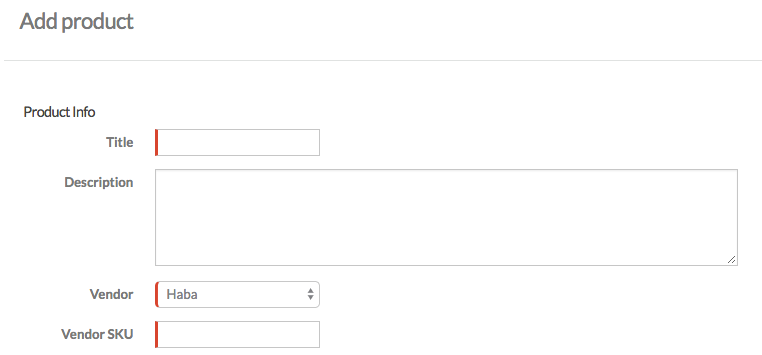
- Click Actions and select Create Kit. This will take you to the Add Product page where you can create a kit as if it were a new product.
- Fill out the required Product Info details, including Title, Vendor and Vendor SKU. You may need to create a new vendor SKU.
- To add more products, simply type a product name or SKU in the “Add Item” field.
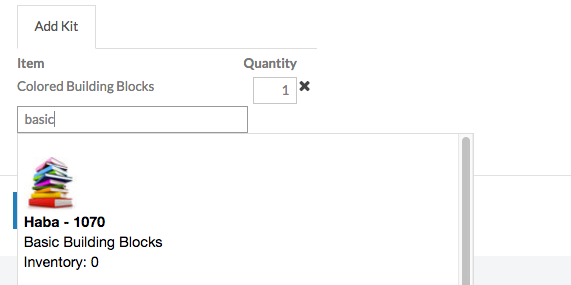
- Search for items to add to the bundle.
- Adjust quantities as needed.
- Click Create to save the new kit.
Converting a Product Copy Into a Kit
The "Convert to Kit" option turns a physical item into a virtual listing. Existing inventory information will be lost once converted, so it is recommended to create a copy of the original product, and use convert that copy, instead of modifying the original product.
- Open the product you wish to copy.
- Click Actions and select Copy/Move.

- In the dialog box, select Copy and mark the checkbox of the item you wish to copy.
- Select any method of copying:

- New Product – Create the copy in a new product ID. Used in most cases, to keep PIDs separate.
- Existing Product ID – Create the copy in an existing product ID. Select this method if you want to keep the original base item and the kit under the same PID.
- Click Submit.
- This will create an exact copy of the original product. Again, do not alter or change anything in the original product listing; only make changes to the copied product, which you will be automatically redirected to.
- From the copied product, click Actions and select Convert to Kit.

- By selecting Convert to Kit, you will need to select the main product(s) from which the inventory is pulled from. Make sure to have the product ID or item ID ready so you can do a quick search when adding.
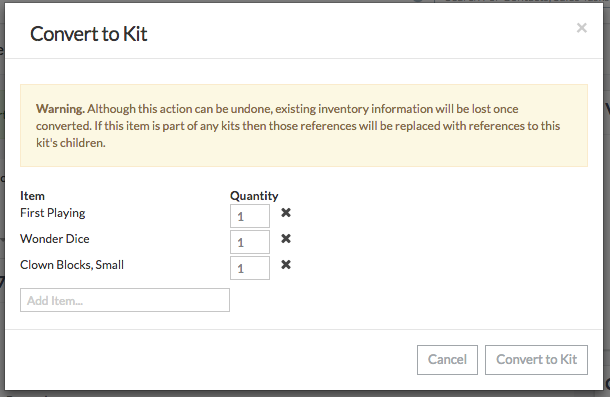
- To create a bundle, search for the original products in the “Add Item” field by using its Description or SKU. Enter the quantities for those items in the bundle.
- To create a shadow listing or virtual kit, search for the original product in the Add Item field and leave the quantity as 1.
- Click Convert to Kit to finish.
Editing an Existing Kit
Once you create a kit, you can edit the quantities or replace its items.
- Open an existing kit product.

- The Inventory section’s Kit Items will show all the items within the kit. Click the pencil icon to make modifications:
- Adjust the item quantities as needed.
- Click X to delete a product.
- Type into the Add to Kit field and click on the item to add it to the kit.
- Click Edit Kit to complete your changes.
Swapping Kit Components in Bulk
An individual item that is a kit component of several kits can be swapped with another item in bulk. Doing so will update all associated kits with another component item.
- Open the kit component item that you would like to replace with another item.
- Click Actions and select View Kits.
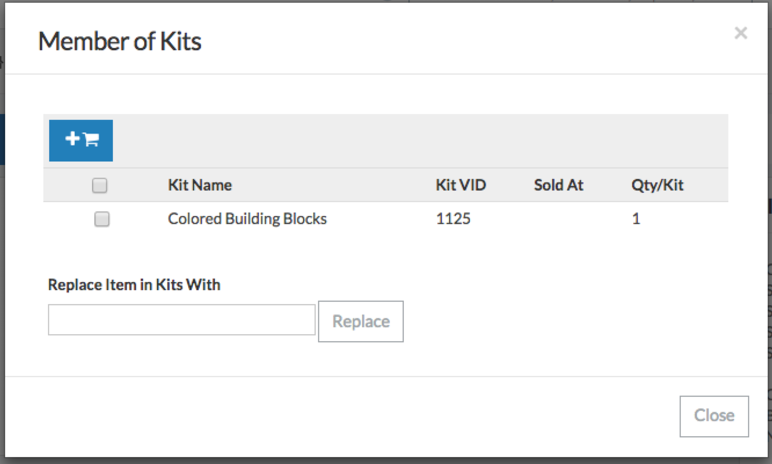
- The dialog box will list out all the kits this item is currently associated with.
- Select a new product from the Replace item in kits with field.
- Click Replace to swap out the current kit component with the new one for all respective kits. The previous kit component page should refresh and show that it is no longer a component of any kits.
Comments
0 comments
Article is closed for comments.