Learn how to create and process batches in Jazva.
Contents:
Overview
Batches initiate the first steps in order processing. By clicking on New Batch, you will start processing the next batch of orders. Once created, you can print the batch, request shipping labels, and review errors, shipping costs and more.
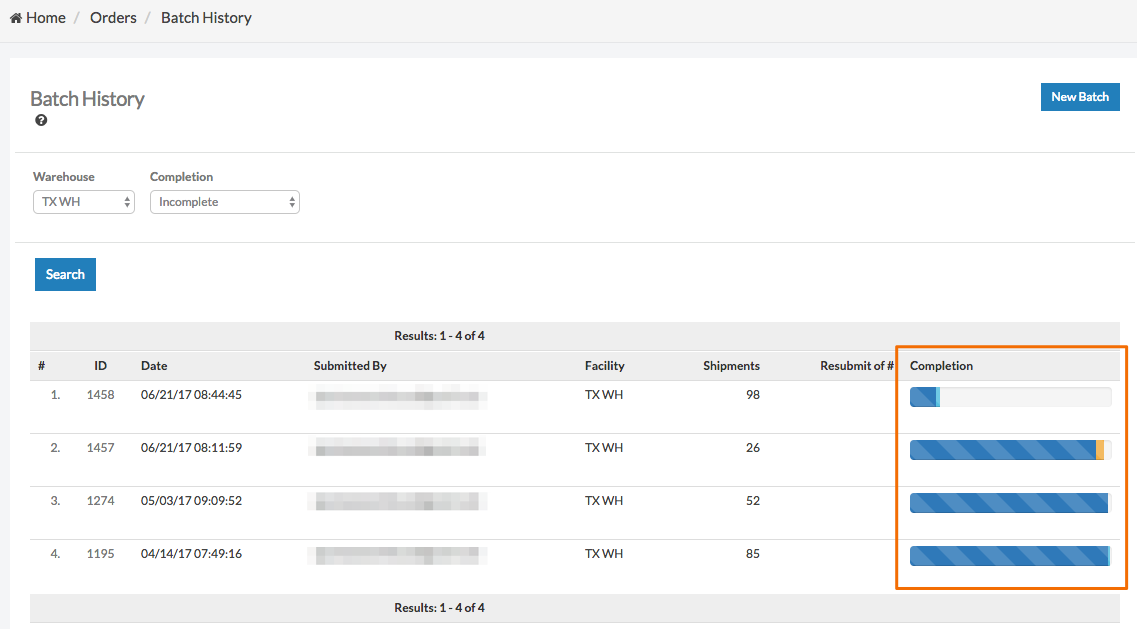
To access your Batches, go to Orders > Pick, Pack & Ship and select Batches. By default, the Batch History page will show only incomplete batches from your warehouse. You can search through your Batch History by changing the Warehouse and Completion status filters.

Completion Bar Colors:
- Green: Labels have been requested (not printed; orders are still in processing). No picklists/labels have been printed.
- Yellow: Labels have been requested (not printed; orders are still in processing) AND picklists have been printed.
- Blue: Labels have been printed AND the orders are fully marked as shipped, either by using the "Ship All Processing" option or by scanner.
- Red: There are one or more batched orders that have an error that prevents Jazva from requesting a label for them.
Creating a New Batch
- From the main menu, navigate to Orders > Pick, Pack & Ship and select Batches.
- Click New Batch to create a batch based on all pending invoices.
- Batches can also be customized based on specific channels, carriers, warehouses and batch sizes.
- For instance, selecting a carrier allows you to prioritize one carrier over the other based on carrier package pickup times.
- To customize your batch, click the New Batch dropdown and select Advanced.
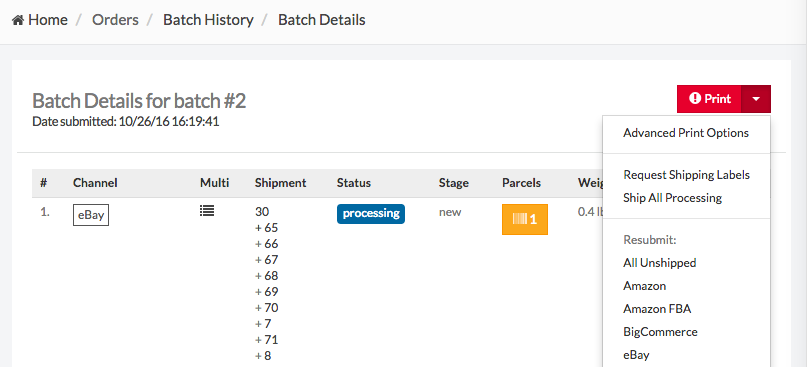
- The Batch Details page will show pending invoices within the batch.
- If the Print button is red - there are errors in the batch. Address corrections may be required.
- If the Print button is green - good batch; printable.
- If the Parcels icon is red - a label cannot be acquired; no rates or applicable mail classes can be found.
- If the Parcels icon is yellow - good to go; a label can be acquired.
- If the Parcels icon is green - a label has been already been acquired or purchased.
- If the Parcel icon is white - the entire order has been marked as shipped.
- Click Print to generate the batch documents.
- You can also Request Shipping Labels or Ship All Processing orders within a batch by clicking their respective options from the Print drop-down menu.

Advanced Batch Printing Options
You can customize your batch by selecting the components that you would like to print.
On the batch details page, click the Print dropdown and select Advanced Print Options.
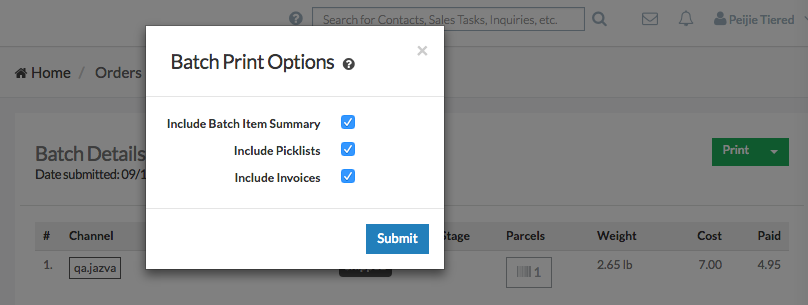
In the dialog box, select the following options to include or exclude before you print your order batch:
- Include Batch Item Summary - Include item summary with order batches. Enabling this option will print a summary of all items to be picked in the batch.
- Include Pickists - Include picklists with order batches. Enabling this option will print picklists with item and location information, along with every shipment in the batch.
- Include Invoices - Include invoices with order batches. Enabling this option will print the appropriate documents to be included with every shipment in the batch.

Adjusting Your Default Batch Settings
Your default Batch Print preferences can be adjusted from the Global Settings page. Batches are created based on the options set in your Global Settings. There, you can fine tune your shipping workflow, such as adjust batch sizes, choose to pre-print shipping labels along with pick-lists, or decide to print pick lists on letter size plain paper instead of 4x6 thermal labels.
The options "print_batch_item_summary", "print_invoices", and "print_picklists" will dictate what is printed when you click the Print button directly from the Batch Details page.
Your default settings will be applied for both small pick lists printed on 4x6 label printer paper when the small picklist option is selected, as well as when the batch is saved as a PDF to be printed on small-sized, letter-sized, etc. paper.
To learn more, please visit Global Shipping Settings.

Comments
0 comments
Article is closed for comments.