Learn how to add and modify user permissions and roles.
Contents:
- Adding a User
- Modify a User
- Setting up Alerts and Assignments
- Managing User Roles
- Setting Up Permissions
As an all-in-one software, Jazva offers several modules that can be accessed by different types of system users. You can set roles and permissions that can vary from one user to another, such as your warehouse staff or listing manager.
Adding a System User
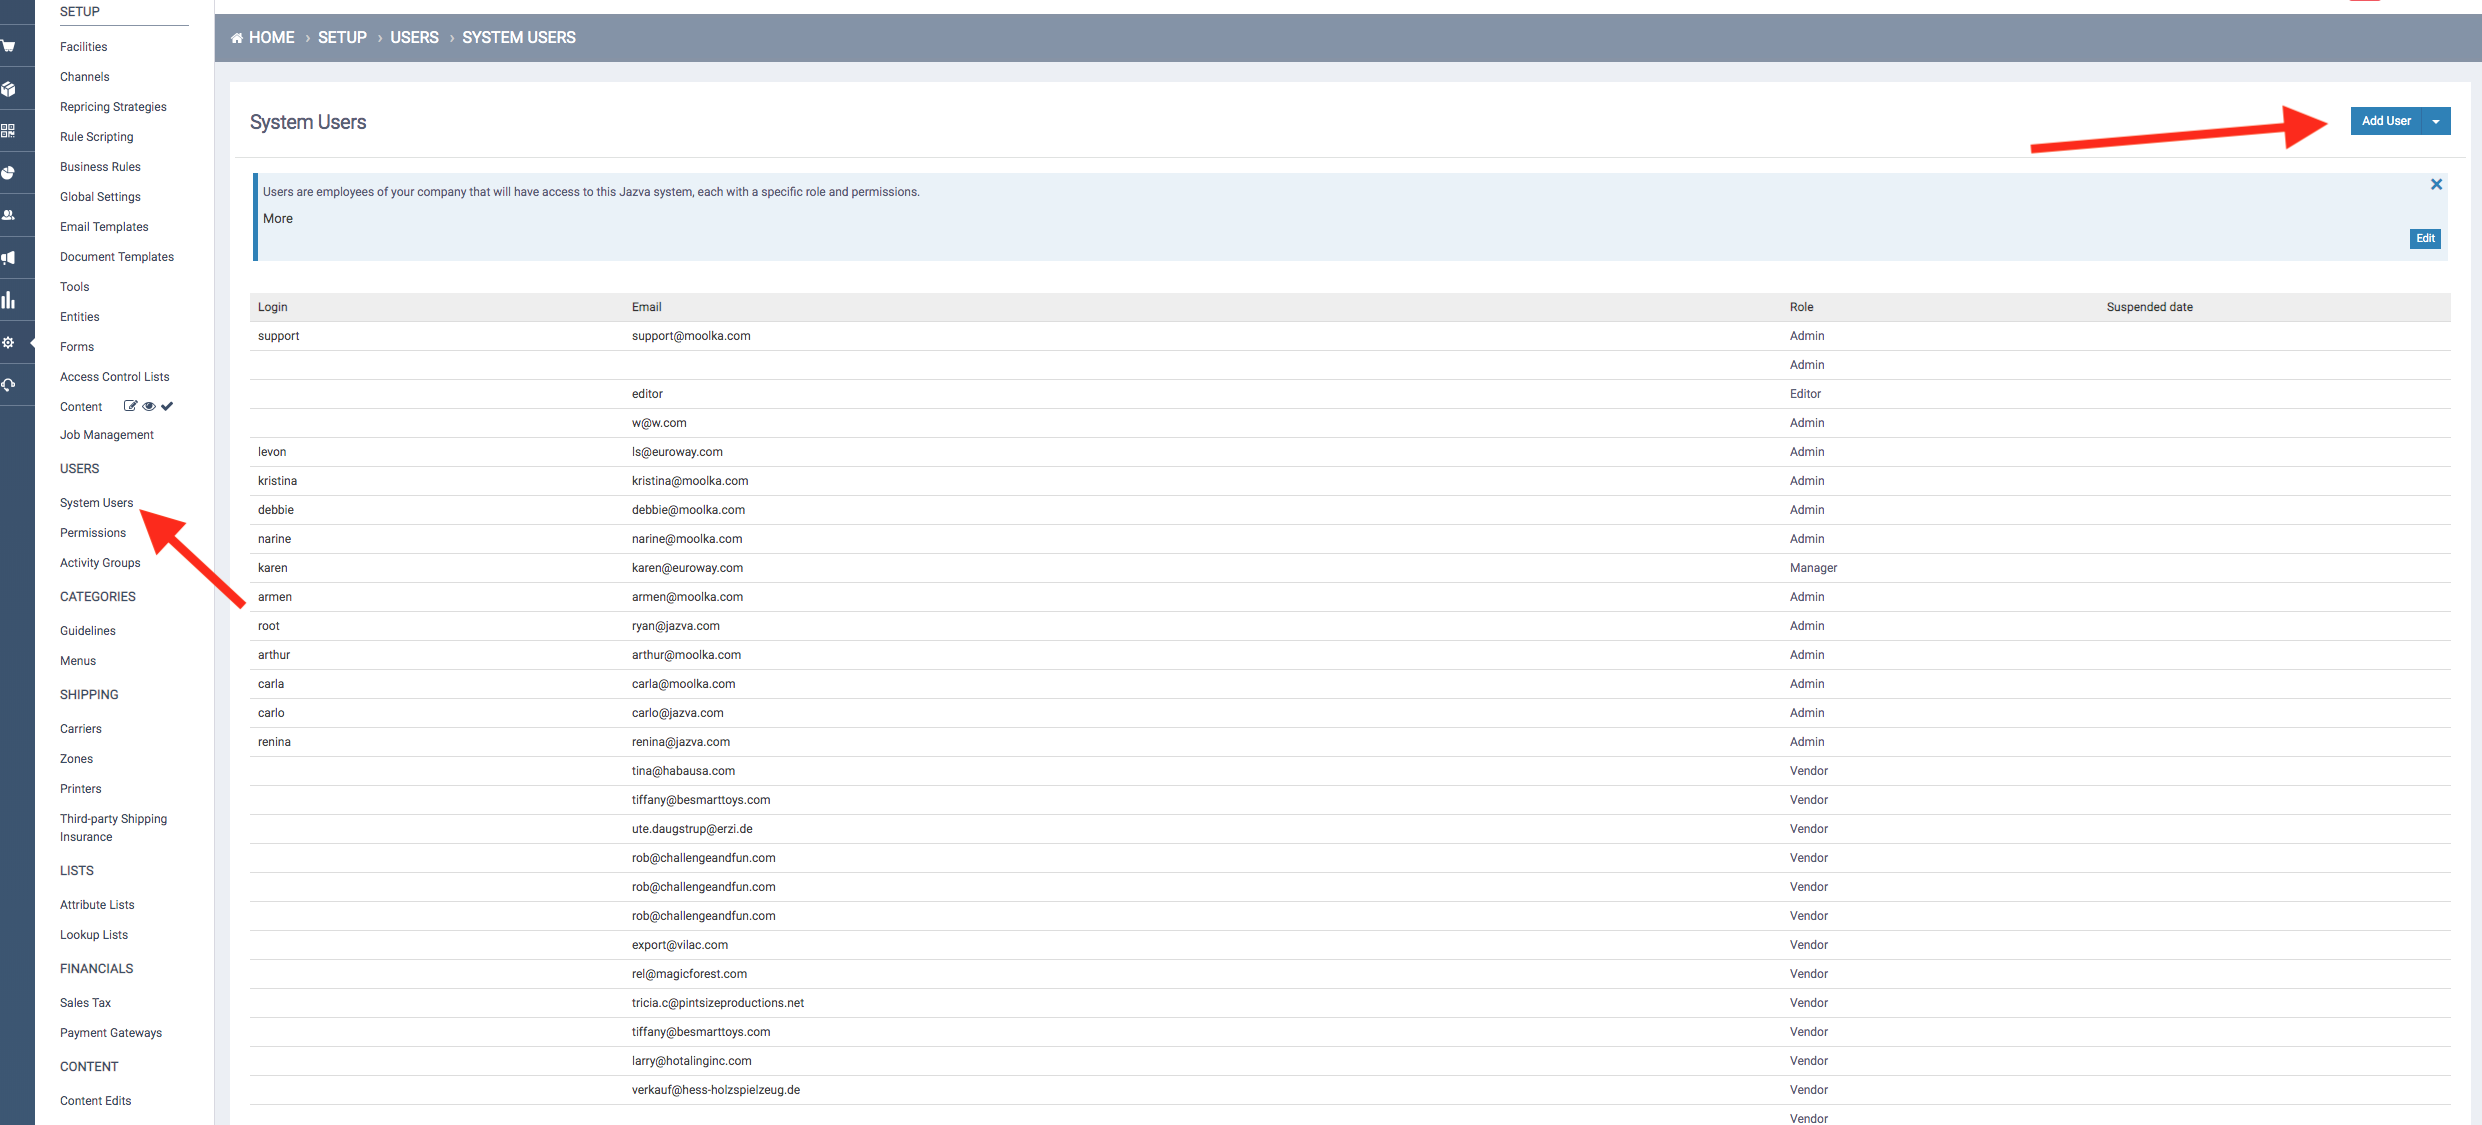
- From the main menu, navigate to Setup > Users and select System Users.
- Click Add User.

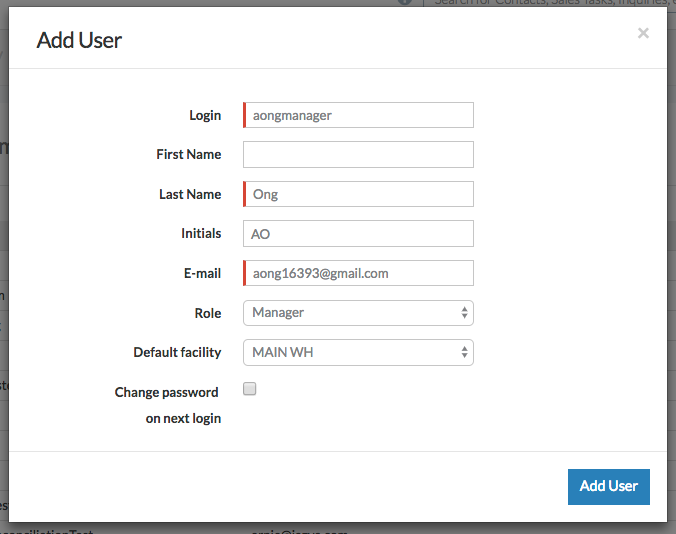
- Fill out the following required fields:

- Login - Select a username for login purposes.
- Last name - For internal record.
- Initials - Enter the user’s initials for internal record.
- E-mail - Enter the user’s email address.
- Role - Select a role for this user. Adjusting role permissions are discussed in the Managing User Roles section below.
- Default Facility - Select the default facility assigned to this user whenever inventory management module is used, such as with the Jazva mobile app.
- Click the “Change password on next login” checkbox so that the user will be required to update their password the next time they login.
- Click Add User to finish.
Modifying a User
- From the main menu, navigate to Setup > Users and select System Users.
- Select a user.
- To view all existing users, you can click on the dropdown button next to Add User and select Show Suspended Users. This will show you all users, active and suspended. You can hide these users again by clicking Hide Suspended Users from the dropdown
- To view all existing users, you can click on the dropdown button next to Add User and select Show Suspended Users. This will show you all users, active and suspended. You can hide these users again by clicking Hide Suspended Users from the dropdown
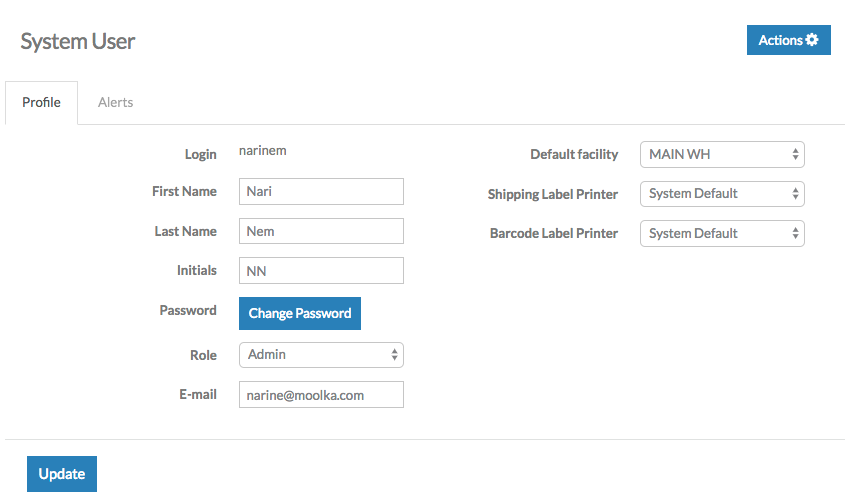
- Modify or update this user’s settings (i.e. change password, assign facilities, choose default printers, etc.)

- If you need to suspend a user, simply click Actions > Suspend. Alternatively, you can Unsuspend the user from the same dropdown.
- Click Update to finish.
Setting up Alerts and Assignments
Alerts are notifications that are generated based on various conditions. Jazva comes with an extensive library of alerts, and you can add your own alerts as well.
Common alerts include low stock notifications, overdue invoices, abnormal account balances, etc.
You can define your own alerts and subscribe users to them via custom reports and automation actions.
- From the main menu, navigate to Setup > Users and select System Users.
- Select a user.
- Switch to the Alerts tab.
- Specify which alert groups or individual alerts this user should be subscribed to. Additionally, you can specify if the alert should be related as a "To-do" task instead of a simple alert.

Managing User Roles
User roles let you set access permissions to different system features by specific user types (i.e. “Admin” or “Warehouse”). There is a default set of roles that are provided upon initial setup, but you can modify or add roles as needed.
- From the main menu, navigate to Setup > Users and select Permissions.
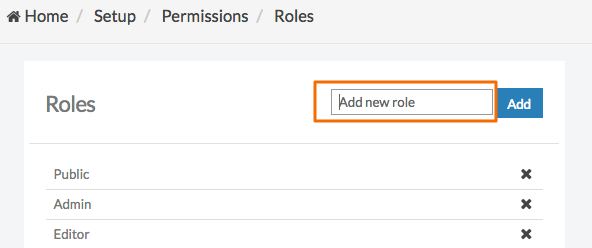
- Click Roles to access the Roles setup page.
To add a role:
- Enter the role name in the "Add New Role" textbox and then click Add.

To delete a role:
- Click the "X" next to the role that you would like removed.
Setting Up Permissions
User Permissions all feature access controls to be set for each user role (e.g. allow an Accountant to only have access to the Accounting app).
- From the main menu, navigate to Setup > Users and select Permissions.
- You will find the permissions table, with the first column indicating the list of permissions, while the top row lists all of the user roles that have been set up.

- Click the checkbox on each permission row you would like each role to have access to.
- After setting up the permissions for each role, click Submit at the bottom of the page to save these settings.
Comments
0 comments
Article is closed for comments.