Linking your carrier accounts to Jazva is simple. Below is an overview of this article's contents. After reading the overview, you may select specific areas of assistance relating to carrier settings to help you simplify the tedious shipping process.
Article Contents
- Overview
- FedEx: Shipping Credential Acquisition
- FedEx: Adding Shipping Carrier in Jazva
- UPS: Adding Shipping Carrier in Jazva
- USPS (Endicia): Adding Shipping Carrier in Jazva
- Deleting Shipping Carrier
- Related Articles
Overview
Jazva is fully integrated with all major shipment carriers such as UPS, FedEx, and USPS. See Figure 1. We’ve partnered with Endicia to offer our customers low commercial rates and USPS shipment management in Jazva. As an additional business advantage, Jazva will automatically select the lowest shipping rate possible from all of your carriers linked to Jazva.



Figure 1
To speed up the process of adding shipping carriers, we recommend having your FedEx and UPS credentials handy. If you do not have a pre-existing UPS or FedEx account, visit the following links to create one:
Tip: Take advantage of discounted Commercial Plus rates by registering with Endicia.
______________________________________________________________________
FedEx Shipping Credential Acquisition
First and foremost, you must acquire FedEx API (Application Program Interface) credentials and other related account information. Your Jazva Implementation Specialist or Account Manager requires Test and Production credentials to begin the process of adding shipping carriers. Once these credentials are received via email, forward them to your Jazva Implementation Specialist or Account Manager.
STEP 1: FedEx Account Login
- Visit FedEx Web Services
- Enter FedEx User ID and Password. See Figure 2.
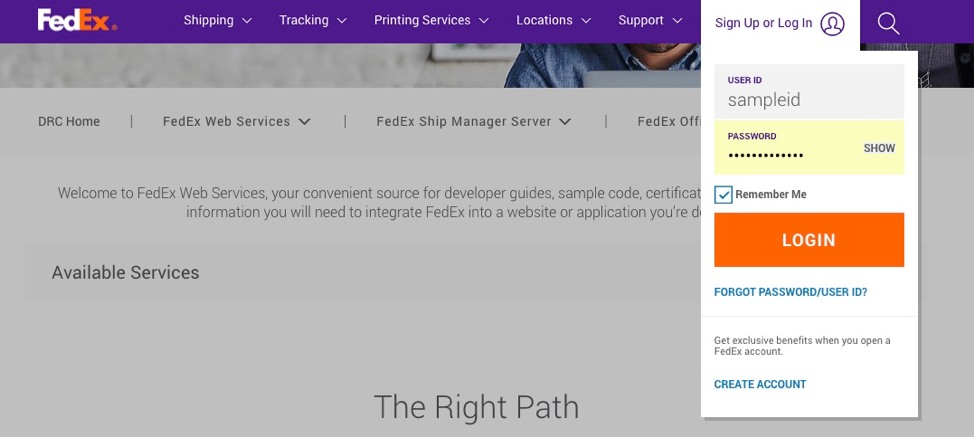
Figure 2
STEP 2: Acquiring FedEx Test Credentials
- Select FedEx Web Services.
- Click Develop and Test link under the FedEx Web Services Overview section.
- FedEx will automatically re-direct you to Develop and Test section. Once there, click on GET YOUR TEST KEY link. See Figure 3.

Figure 3
- Next, complete FedEx’s Registration Test System form composed of three (3) steps (Contact Info, License Authorization, and Confirmation).
- Click Accept for confirmation.
- Upon submission, confirmation page containing Developer Test Key, Test Account Number, and Test Meter Number will be displayed.
- Copy Confirmation screen data (Starting from Congratulations! and ending with Test Client Product Version). See Figure 4.
- Paste Step 4 Confirmation screen data onto an email communication and forward to your Jazva Implementation Specialist or Account Manager.
- FedEx Test Account Information will be provided in a separate email (Subject heading “Your Developer Test Key Registration is complete”).
- Forward saved Confirmation table information in step 4 and FedEx’s Test Key Registration email from step 5 to your Implementation Specialist or Account Manager.
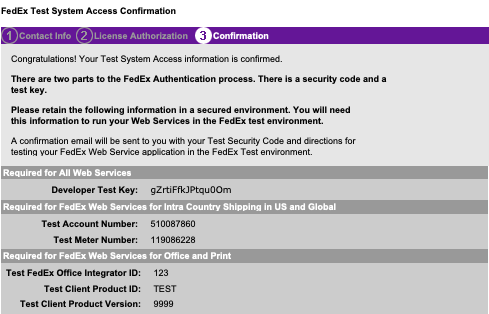
Figure 4
This completes FedEx Test credential process. Let's proceed in acquiring FedEx Production credentials section.
STEP 3: Acquiring FedEx Production Credentials
- Select FedEx Web Services.
- Click Move to Production link under the FedEx Web Services Overview section.
- FedEx will automatically re-direct you to Develop and Test section. Once there, click on GET PRODUCTION KEY link. See Figure 5.

Figure 5
- Next, complete FedEx’s Web Services Production Access form composed of five (5) steps (Profile, Agreement, Contact Info, Developer Information and Confirmation).
- Click Accept for confirmation.
- Upon submission, confirmation screen data containing Authentication Key, Account Number, and Meter Number will be displayed.
- Copy Confirmation screen data (Starting from Congratulations! and ending with Meter Number) onto an email communication and forward to your Implementation Specialist or Account Manager. See Figure 6.
- Paste Step 4 Confirmation screen data onto an email communication and forward to your Jazva Implementation Specialist or Account Manager.
- FedEx Production Account Information will be provided in a separate email (Subject heading “Your developer Production Key Registration is complete”).
- Forward saved Confirmation table information in step 4 and FedEx’s Test Key Registration email from step 5 to your Implementation Specialist or Account Manager.
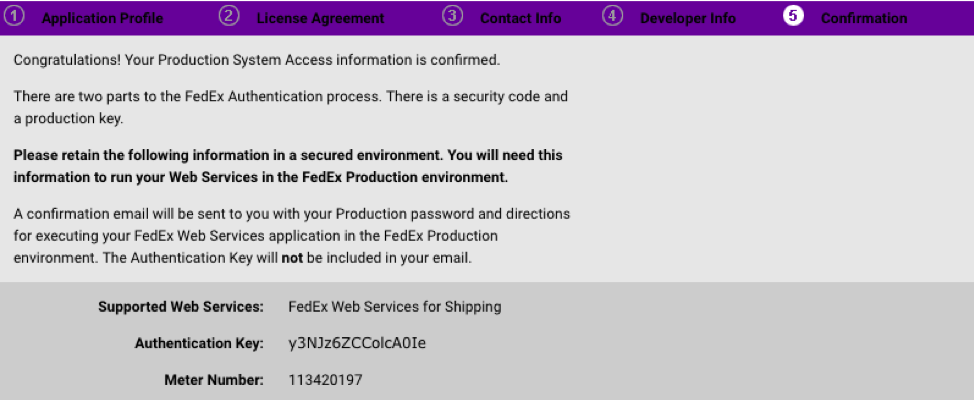
Figure 6
This completes FedEx Production credential process. Let's proceed in adding FedEx as our shipping carrier within Jazva.
______________________________________________________________________
FedEx Shipping Carrier Jazva Setup
Jazva’s deep integration with FedEx makes it simple linking existing accounts. A multitude of mail classes are available out of the box, such as Mail Innovations, SurePost, etc. Please, have your FedEx Production and Test credentials readily available.
If no credentials have been attained, please refer to Shipping Credential Acquisition section of this article.
Step 1: Adding FedEx
- From the menu left-sided panel, navigate to Setup -> Shipping -> and select Carriers.
- Click +Add Carrier.
- Select FedEx icon. This action will launch setup wizard. See Figure 7.
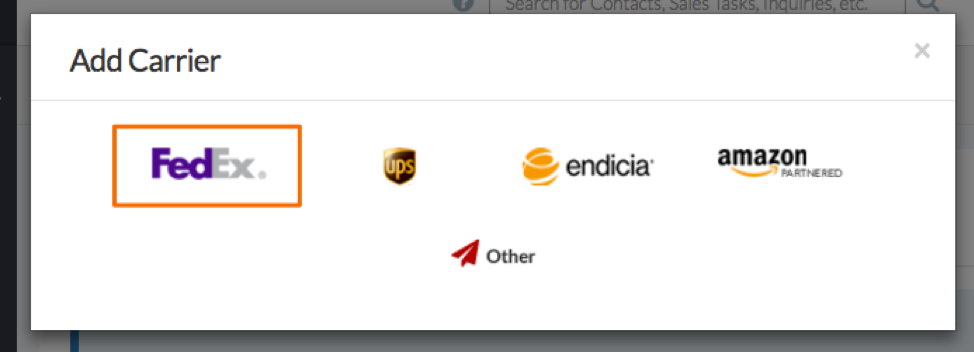
Figure 7
In the Add new carrier pop-up window, fill all pertinent carrier information. See Figure 8.
- Name - Carrier Name
- Account Number - Test Production Account Number
- Authentication Key - Test Production Authentication Key
- Production Meter Number -Test Production Meter Number
- Production Password - Test Production Password Number
- Enable Test/Certification Mode
- Click Submit once completing field data.

Figure 8
Once you completed above mentioned steps, the following instructions on your screen. See Figure 9
Figure 9
- Click the mentioned link to Print the certification labels and Download 2 custom forms.
- Scan the printed labels to PDF file.
- Download and Fill out the FedEx cover letter.
- Send the cover letter, scanned labels and downloaded custom forms to labels@fedex.com
Once FedEx sends an email approving the certification, please, fill all relevant fields
- Name - Carrier Name
- Account Number - Production Account Number
- Authentication Key - Production Authentication Key
- Production Meter Number -Production Meter Number
- Production Password - Production Password Number
- Disable Test/Certification Mode
- Click Submit once completing field data.
Note1:The above bulleted point information can be found in FedEx's "Your developer Production Key Registration is complete" email. The only exception is Carrier Name.
Note2: The Production Password is not your FedEx Login.
Step 2: Entering Settings
FedEx carrier settings:
- Next Ship Date - When you expect to start shipping with this carrier.
- Jazva Billing Code - Internal use (optional).
- Status - This is mainly used for testing, but you can also use this setting to deactivate the carrier if needed.
- Additional Handling- You can add additional handling options or leave this section blank. Adding information here will increase the cost for all shipments for that carrier.
- Shipping Label Reference Fields- You can print custom data on the shipping labels if needed.
- Click Update upon carrier information completion.
- ETD Images for Customs Invoices- Upload letterhead and signature images to accompany electronic commercial invoices on shipments and to avoid delays.
We recommend setting up at least one (1) mail class at a later time. For more details, refer to Creating Mail Classes.
For more FedEx SmartPost options, please visit How to Use FedEx SmartPost in Jazva.
______________________________________________________________________
UPS Shipping Carrier Jazva Setup
Jazva’s deep integration with UPS makes it simple linking existing accounts. A multitude of mail classes are available out of the box, such as Mail Innovations, SurePost, etc. Please, have your UPS credentials readily available.
Step 1: Adding UPS
- From the main menu, navigate to Setup > Shipping and select Carriers.
- Click +Add Carrier.
- Select UPS to launch setup wizard. See Figure 10.
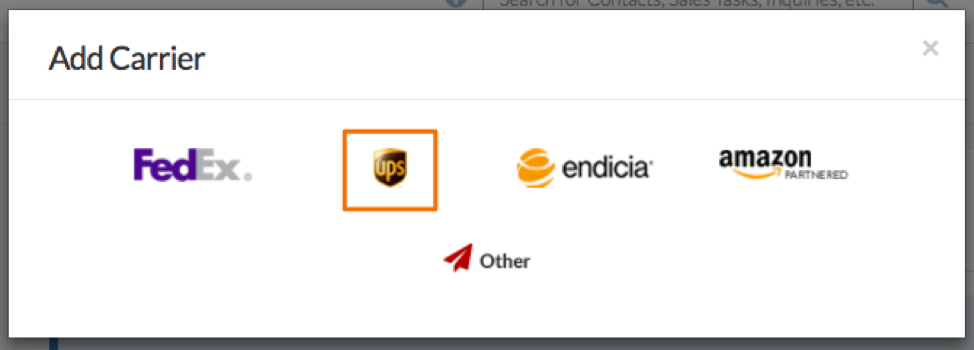
Figure 10
Select I Agree checkbox after reading License Agreement, and click Next. See Figure 11.

Figure 11
Fill out the required fields on the Account Data tab:
- Company Name
- Contact Name
- Title
- Street Address
- City
- State
- Postal Code
- Country
- Phone Number
- Email Address
- Shipper Account Number (UPS Account information)
- Account Postal Code (UPS Account Information)
Click Next.
The Negotiated Rate tab is optional. This feature permits linking users current rates. See Figure 12.
- Invoice Number - Obtained from your UPS account
- Date – Invoice Date
- Amount - Invoice Total amount
- Control ID - Obtain this from your UPS account, invoices/bills or from your account portal
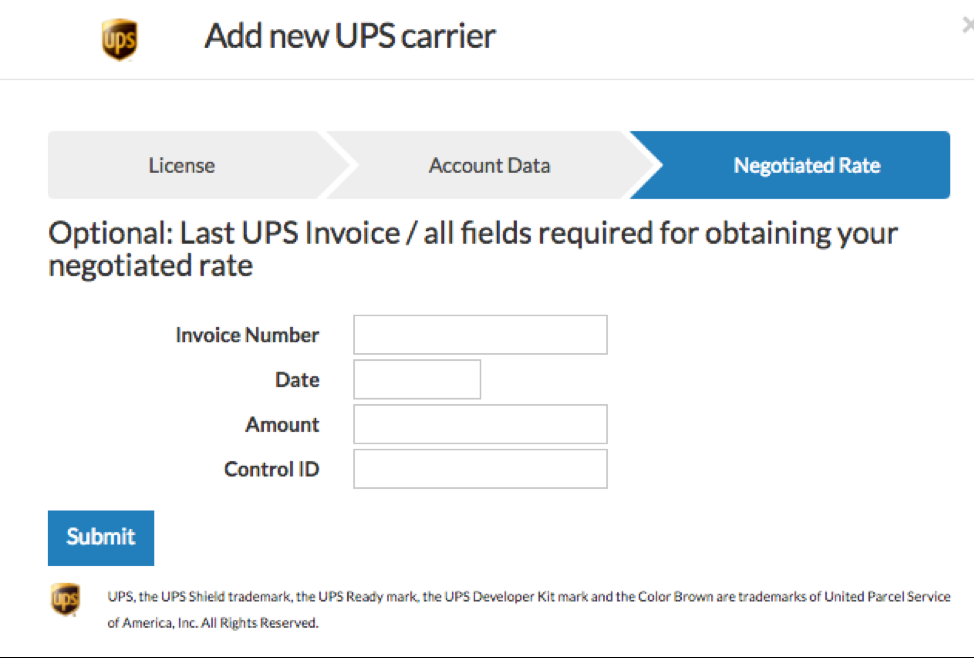
Figure 12
Click Submit to complete setup. UPS carrier settings can be completed in the next page.
Note: Most recent UPS Invoice information is required completing form fields under Negotiated Rate tab.
Step 2: Entering Settings
UPS carrier settings:
- Next Ship Date - When you expect to start shipping with this carrier.
- Authentication Key - Jazva developer key.
- API username - Your UPS login credentials.
- Production Password - Your UPS login credentials.
- Jazva Billing Code - Internal use (optional).
- Status – Mainly used for Testing purposes. If required, you may use this setting for carrier deactivation.
- Additional Handling - You may add additional handling options or leave blank. Adding information will increase shipment costs for this carrier.
- Shipping Label Reference Fields – If required, you may print custom data on shipping labels.
Once changes are completed, click Update to save your carrier information.
We recommend setting up at least one (1) mail class. However, you may perform this at a later time. For more information, please refer Creating Mail Classes.
Step 3: Alternate UPS Account Setup (Optional)
As another UPS account registration avenue, click on an existing UPS account from Carriers page. Once UPS Account page is open, refer to Accounts section located on right side and click Register a new account. See Figure 13.
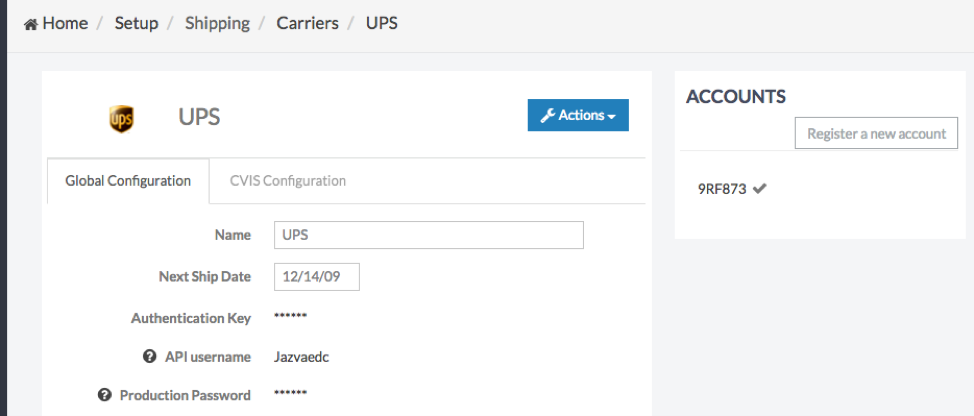
Figure 13
In addition to standard shipping, our advanced integration with UPS allows users in processing large shipments through trailer usage. Jazva may automate this process only for current UPS users of this particular service. For more details, please visit UPS CVIS Trailer Support.
______________________________________________________________________
USPS (Endicia) Shipping Carrier Jazva Setup
We are very excited in offering our clients with low Commercial Plus rates at no charge! This is possible through a Jazva partnership with Endicia in providing USPS shipping services.
The only requirement… new Endicia account registration within Jazva environment.
Now, if you are a current special Endicia/Express1 account holder with negotiated rates, Jazva is equipped with a feature using its setup wizard; allowing current account holders with l automatically select most cost-effective account for each shipment.
You will have the ability accessing all USPS’ mail classes and purchase postage directly through your Jazva account.
Step 1: Adding Endicia
- From the main menu, navigate to Setup > Shipping and select Carriers.
- Click +Add Carrier.
- Select Endicia to launch setup wizard. See Figure 14.
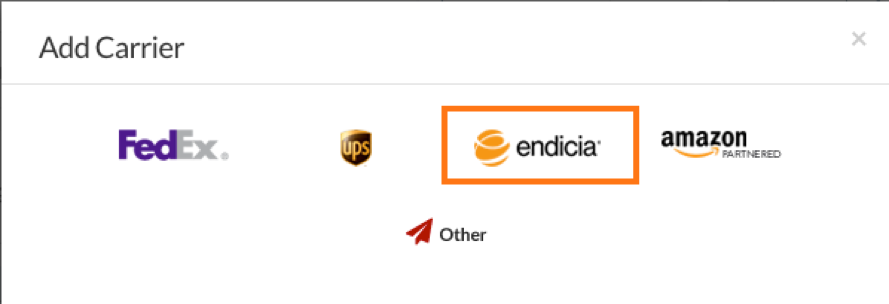
Figure 14
Select Type of USPS account that pertain from the three (3) existing options:
Option 1: For new Discounted Endicia accounts, check Create new Endicia discounted account (Recommended) checkbox. See Figure 15.
Click Next and Complete Account Sign Up, API Information, Postage and Options, and Confirmation.

Figure 15
Option 2: For new Regular Endicia accounts, perform the following:
Click Show more options link to display additional Endicia account options. See Figure 16.

Figure 16
Check Create new regular Endicia account checkbox and click Next. See Figure 17.
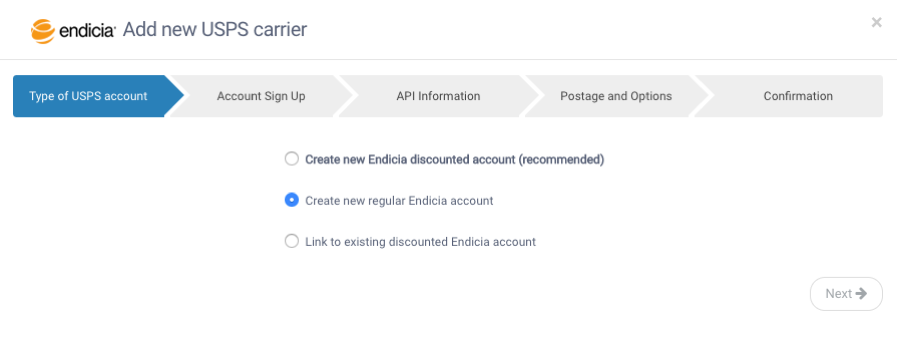
Figure 17
- Complete Account Sign Up, API Information, Postage and Options, and Confirmation tabs.
- Click Submit to complete setup.
Option 3: Linking to Existing Discounted Endicia accounts, perform the following:
Click Show more options link to display additional Endicia account options. See Figure 18.

Figure 18
Check Link to existing discounted Endicia account checkbox and click Next. See Figure 19.
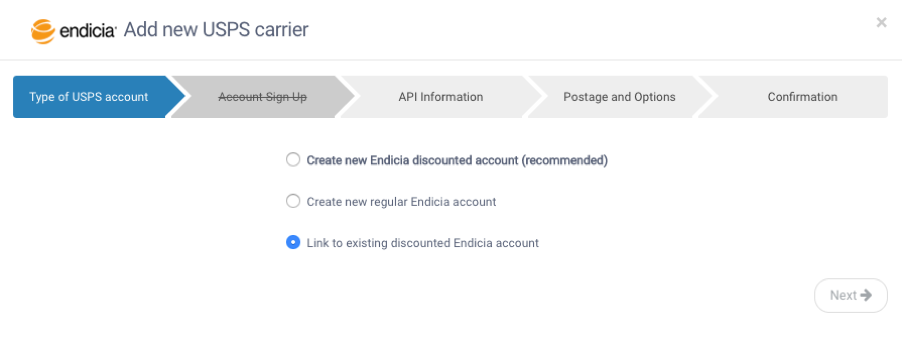
Figure 19
- Complete API Information, Postage and Options tabs.
- Under Confirmation tab, review account parameters and click Finish in completing setup. See Figure 20.
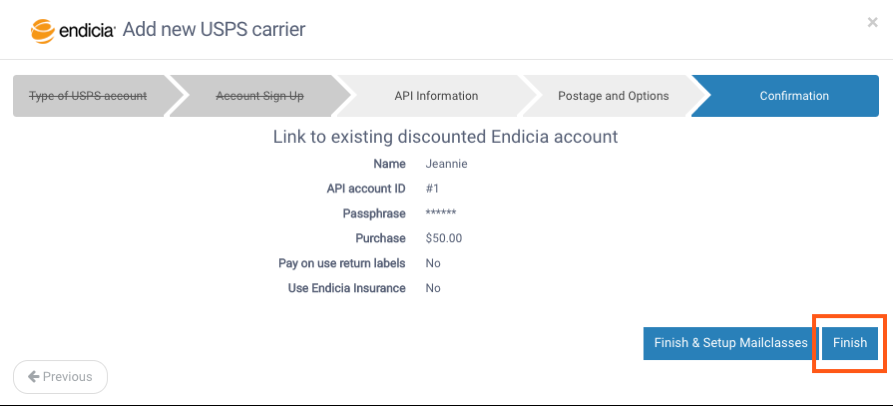
Figure 20
Tip: To link your existing discounted Endicia account, you are required obtaining account ID and passphrase from your Endicia account. Note, API Account ID and Passphrase are different from your Endicia login credentials.
Step 2: Entering Settings
- From menu panel located on the left of the screen, navigate to Setup -> Shipping -> and select Carriers.
- Click Endicia icon link. See Figure 21.

Figure 21
Any required account changes can be performed in this page. See Figure 22.
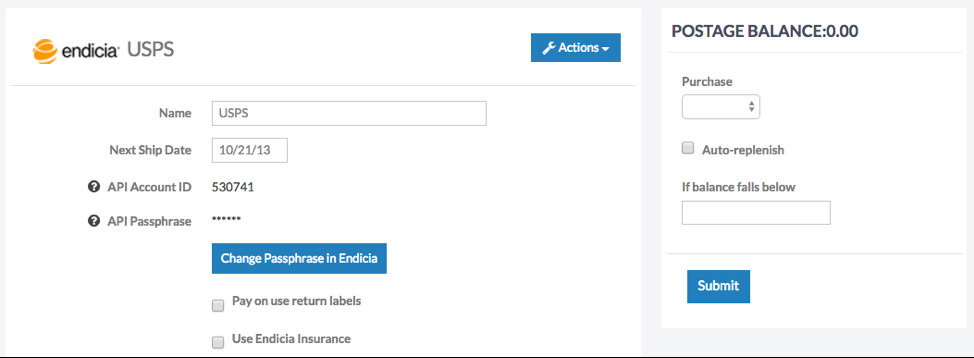
Figure 22
Endicia Carrier Setting descriptions:
- Next Ship Date – Expected Start ship Date with this carrier
- API Account ID - Obtain from your Endicia account
- API Passphrase - Obtain from your Endicia account (Note: Not the same as your Endicia login.)
- Pay on use return labels - Mark this checkbox to enable pay on use return labels.
- Use Endicia Insurance - Mark this checkbox to use Endicia Insurance
- Jazva Billing Code - internal use (Optional).
- Status - Mainly used for testing. However, you may use this setting to deactivate carrier (Only if required).
- Additional Handling - Additional handling options (Optional). (Note: Adding information here will increase shipment costs for this carrier.)
- Shipping Label Reference Fields - You may print custom data on shipping labels (Only if required).
Once completing changes, click Update to save your updated carrier information.
We recommend setting up at least one (1) mail class. However, you may perform this at later time. For more information, refer to Creating Mail Classes.
Postage Balance
You can enable Jazva to automatically replenish your Endicia account. First, select purchase amount (between $10-$1000). Second, select Auto-Replenish. Lastly, enter threshold when this will occur (e.g., when the balance falls below 25).
______________________________________________________________________
Deleting Shipping Carrier
- From the left-sided menu panel, navigate to Setup -> Shipping -> and select Carriers.
- Click carrier you wish to delete. See Figure 23.

Figure 23
Select on Actions -> Delete (e.g., Endicia). See Figure 24.

Figure 24
______________________________________________________________________
Related Articles
Comments
0 comments
Article is closed for comments.