Learn how to manage bills of materials and work orders in Jazva.
Contents:
- Overview
- Prerequisites: Finished Item and Component Kit
- Creating a Bill of Materials
- Creating a New Work Order
Overview
Product assembly tasks can be managed within Jazva’s inventory management system. When you create a bill of materials in Jazva, you specify the required components and record them into the system for future work orders.
A bill of materials (BoM) is a list of components and the quantities of each part needed to manufacture an end product. A work order takes into account all available warehouses and existing component inventory required to manufacture the end product.

Multiple bills of materials can be added to a single work order, and you can have multiple work orders at different stages in the production cycle.
Prerequisites: Finished Item and Component Kit
Before you can create a bill of materials, you must have a Finished Item (end product) registered in the system, in addition to a Component Kit (a kit specifying required components).
Finished items must be an inventory item - that is, a physical item that tracks inventory.
To create a new component kit, follow these steps:
- From the main menu, go to Products and select Add New Product.
- Fill out the product information for the kit.
- Toggle to the Add Kit tab and specify the parts and quantities required for assembly.
- Click Create to finish.
Creating a Bill of Materials
- From the main menu, navigate to Inventory > Manufacture and select Work Orders.
- Click Create Work Orders.
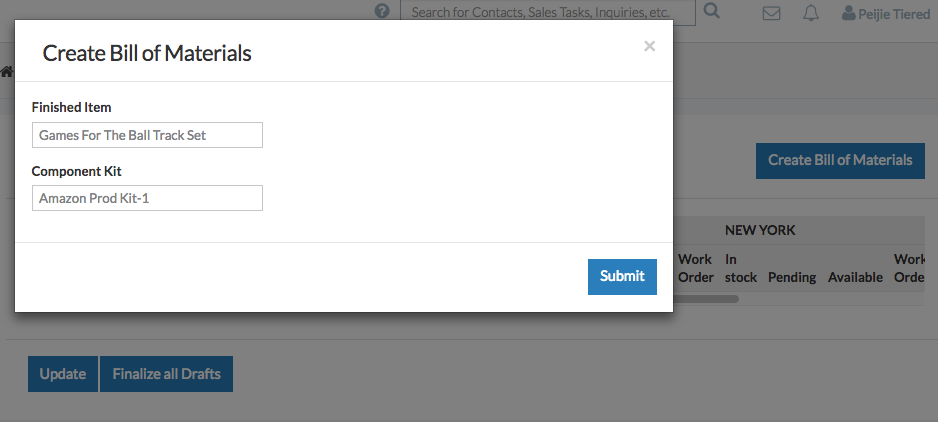
- Click Create Bill of Materials.

- Type in or enter your end product in the Finished Item field.
- Type in or enter the Component Kit to link both products.
- Click Submit to complete.
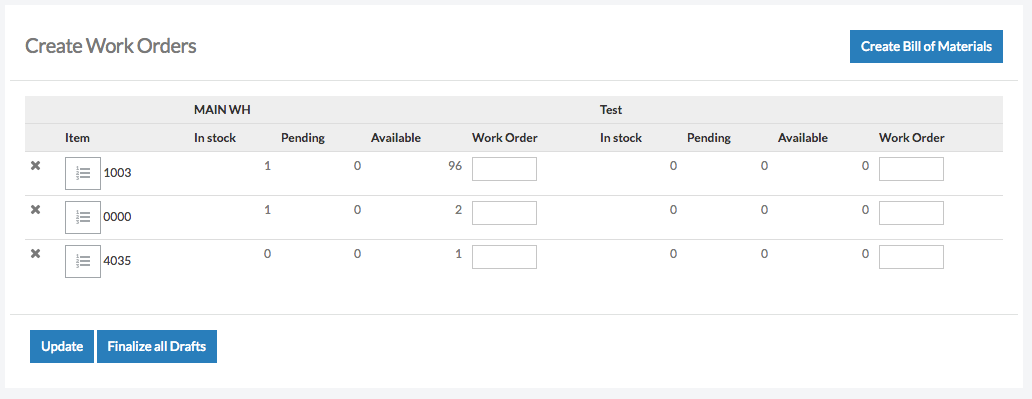
The bill of materials has now been registered in the Create Work Orders page. You can repeat the process above to add as many bill of materials as you’d like before processing a work order.
Bills of materials will be saved on this page for future work orders. A bill of material can be modified by editing the Component Kit (click on the Item Number on this page).

Creating a BoM from a Finished Item
As an alternative, you can create a bill of materials directly from a finished item.
- Open an existing physical inventory item (your end product).
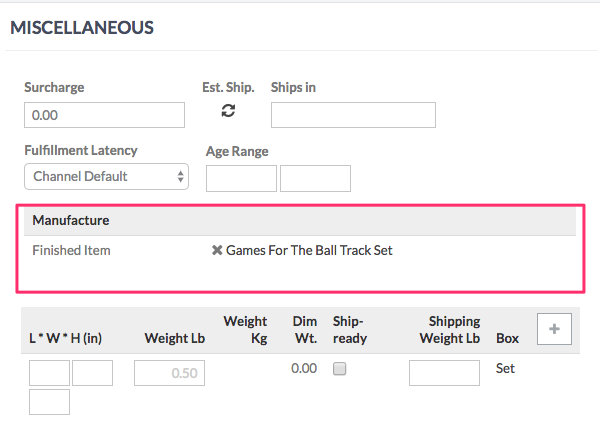
- Scroll down to Miscellaneous > Manufacture and select Create Bill of Materials.
- In the Create Bill of Materials window, link the Finished Item to a Component Kit.
- Click Submit to finish.
Creating a BoM from a Component Kit
As an alternative, you can create a bill of materials directly from a component kit.
- Open an existing physical inventory item (your end product).
- Scroll down to Miscellaneous > Manufacture and select Create Bill of Materials.
- In the Create Bill of Materials window, link the Component Kit to a Finished Item.

- Click Submit to finish.
Creating a New Work Order
Once you have registered your bills of materials, it’s time to start production.
- From the main menu, navigate to Inventory > Manufacture and select Work Orders.
- Click Create Work Orders.
- The Create Work Orders page will list all your bills of materials, showing each of your facilities. Jazva automatically calculates how many available end products you can produce based on available component inventory.
- From the Work Order column, enter the quantity of end products you want to produce in your work order, specifying which facility the work order will be assigned to. You can add multiple bills of materials to a single work order.
- Click Update to save the draft, or click Finalize All Drafts to set the work order as Pending.
Processing a Work Order
- From the main menu, navigate to Inventory > Manufacture and select Work Orders.
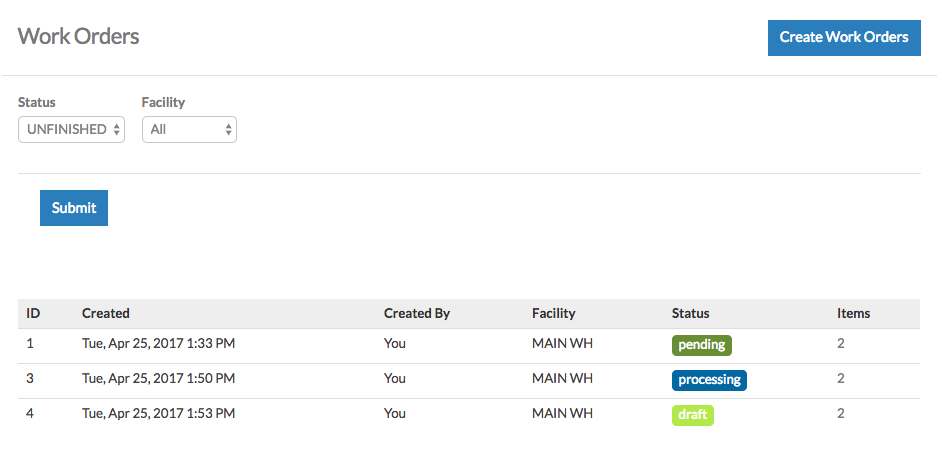
- A list of existing work orders will appear on the Work Orders page. If you have an existing draft or pending work order, it will appear on this list. You can filter work orders by status and facility on this page as well.
- Click on the work order you would like to process. Please note that work orders must be finalized before production can begin.
- From the work order screen, you can still Update Quantity or Cancel the work order as needed.
- Click Start Production to set the work order to Processing.
- To designate a storage location for each of the products, enter a bin location on each Location field.
- Click Put Away to complete the work order.

Comments
0 comments
Please sign in to leave a comment.