
Adding, Modification and Testing label printers.
Article Contents
- Overview
- Print Agent Setup
- Print Agent Troubleshooting
- Print Agent Windows 10 Error 2502 or 2503
- Printer Test
- Alternative Thermal Label Printers
Overview
A printer can be a physical or virtual printer. For virtual printers, users are allowed to convert labels into Adobe Acrobat (PDF) documents for later printing. Jazva has a support for both printer types.
Visit our Recommended Equipment article for best Jazva printer setup and experience.
Print Agent Setup
In case you have a PC or Mac-based shipping station in your warehouse which is connected to one or more label printers, Jazva provides software that can be installed on your system which will help you print labels directly from Jazva.
- Navigate to Setup -> Printers
- Click Download Print Agent

- Install the downloaded binary file on the PC/Mac which is connected to the printers.
- Start the Print Agent application
- Fill in the login details.
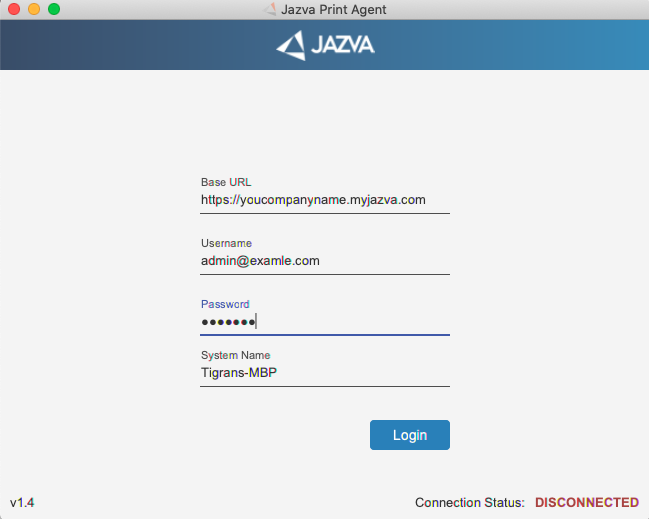
For Base URL refer to the address bar of your browser.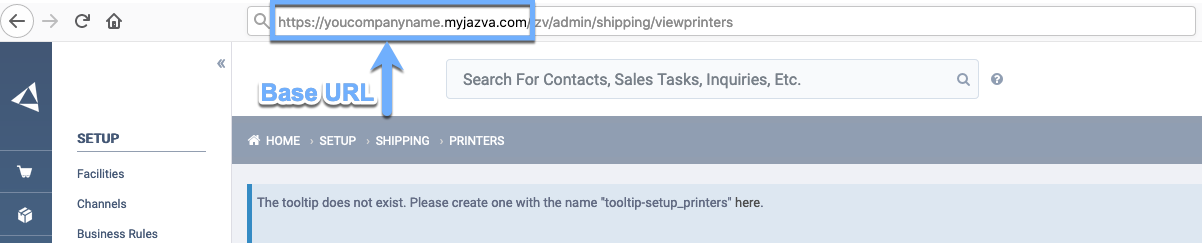
For username and password use the one which you are using for logging into Jazva. - Click Connect
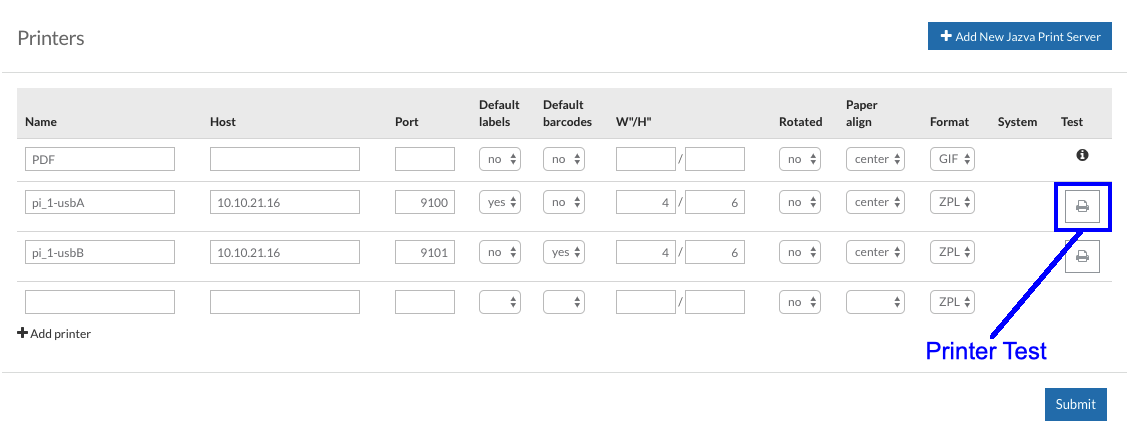
- Refresh Setup -> Printers page.
- Ensure that the printer is connected to the PC/Mac and click on print test page icon.
Print Agent Troubleshooting
In case you are having issues with Print Agent like printing stop working or there are problems with connecting to server you may need to reset the print agent and reconnect to your system.
- Ensure that you are using the latest version of print agent. To do so check if "Update Available" button is visible. If the button is available click on it and download the latest version.
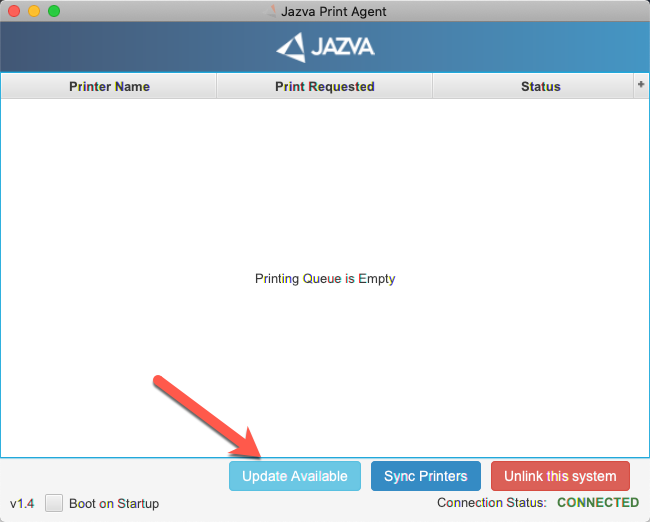
- Stop the running print agent. Just click on close/x button on top bar.
- With you preferred file navigator go to your users home folder (usually that will be C:\Users\YOU_USER_NAME on windows and /Users/YOU_USER_NAME on mac). Find the folder named .jazva and delete it.
- Uninstall and reinstall the print agent. See Print agent setup
Print Agent Windows 10 Error 2502 or 2503
In case you are having issues installing the Print Agent on Windows 10 with the following error codes 2503 or 2502 the problems is the fact that the TEMP folder which is required for installing the print agent is set to read-only mode. To fix that (note that all of the changes below can be undone after the installation) please follow these steps.
1. Navigate to the Windows Temp folder located at c:\windows\temp
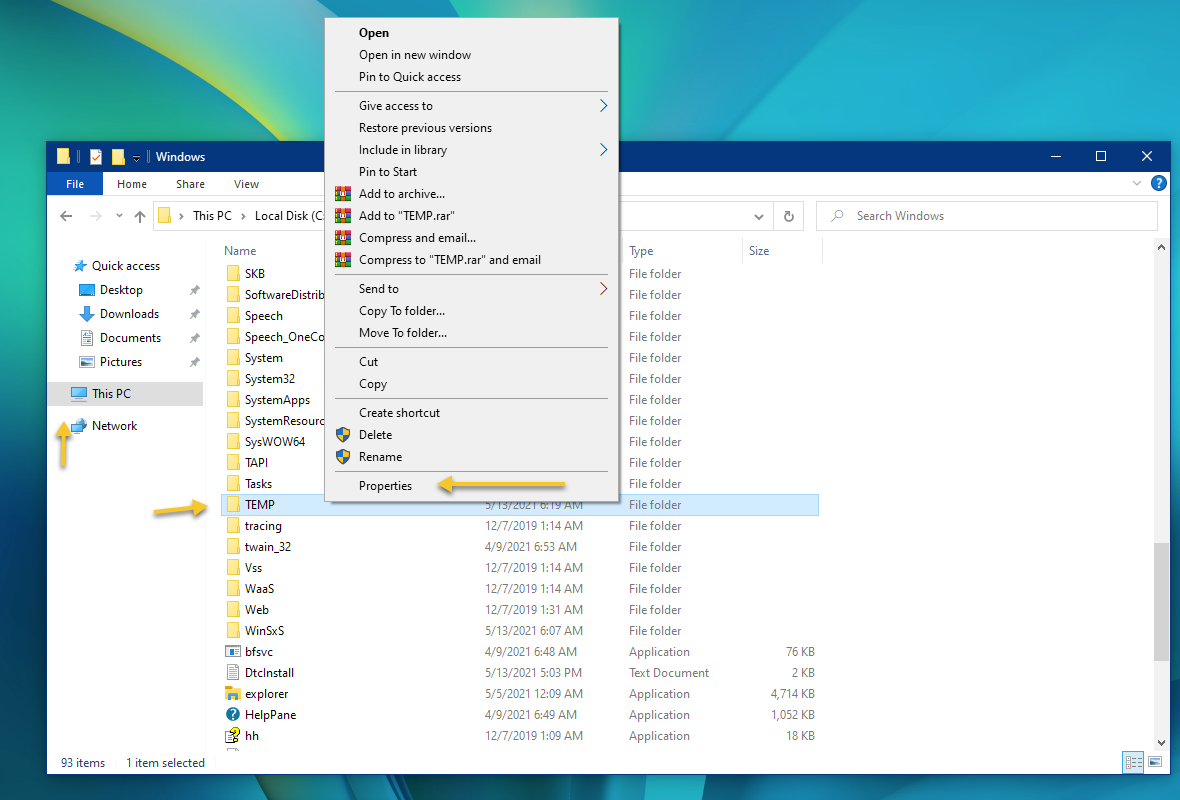
2. Right click on the Temp folder and click on the Properties menu item.
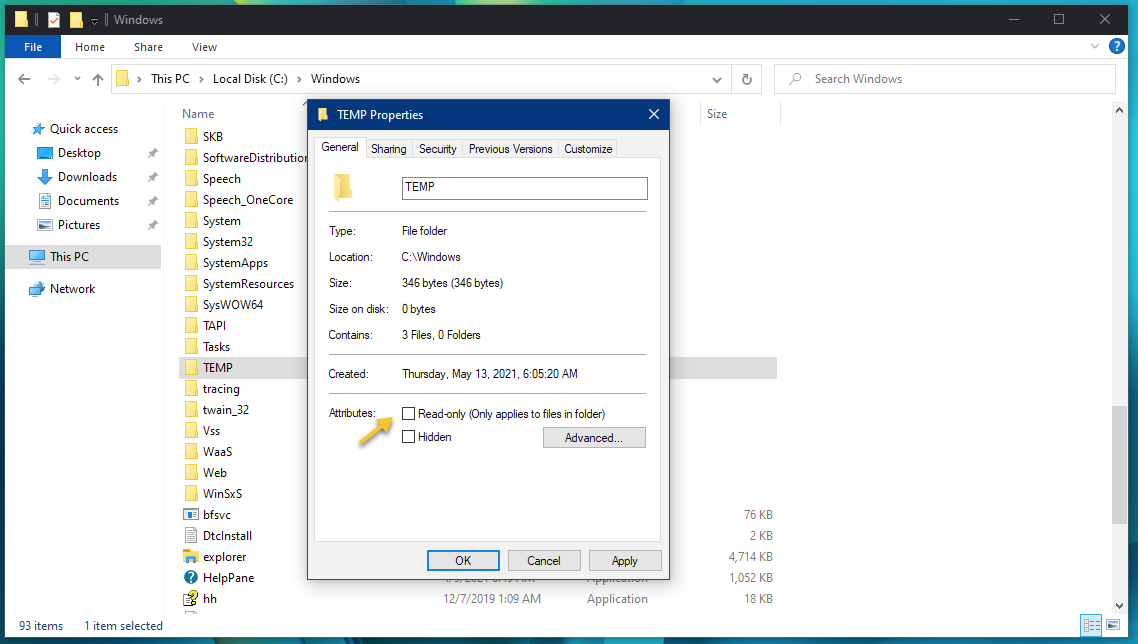
3. Make sure you uncheck the read only button.
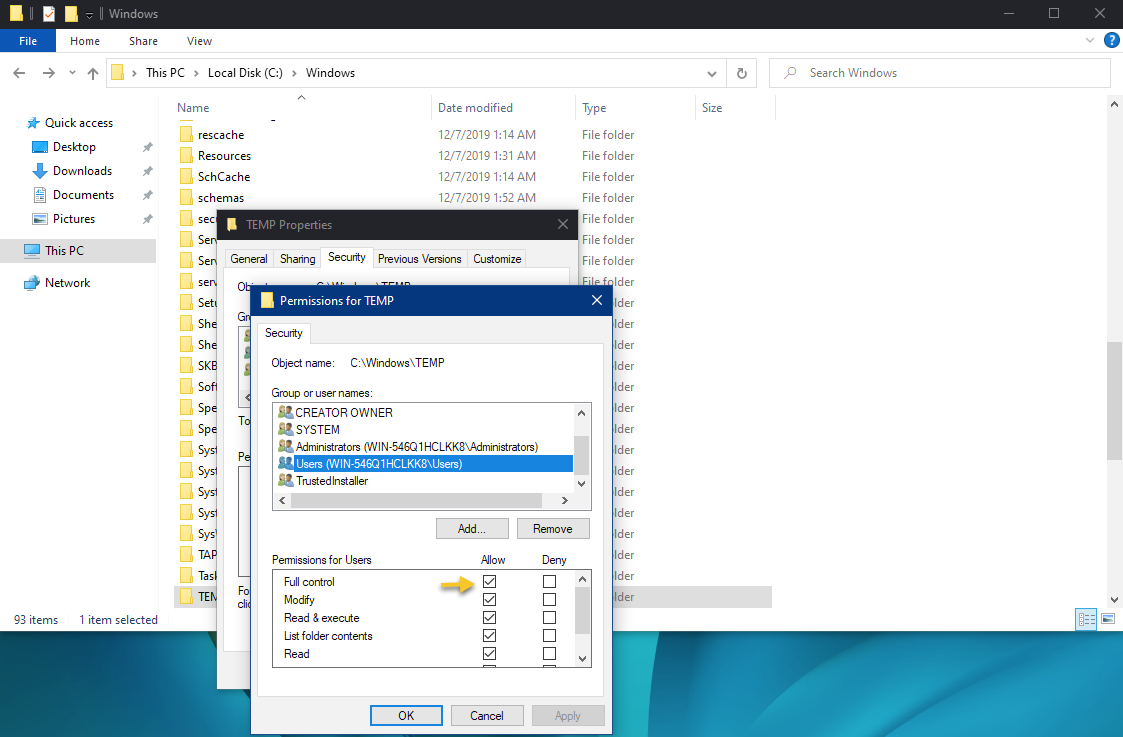
3. Switch to the Security Tab and make sure it is Administrators and USERS groups have a Full Control checked.
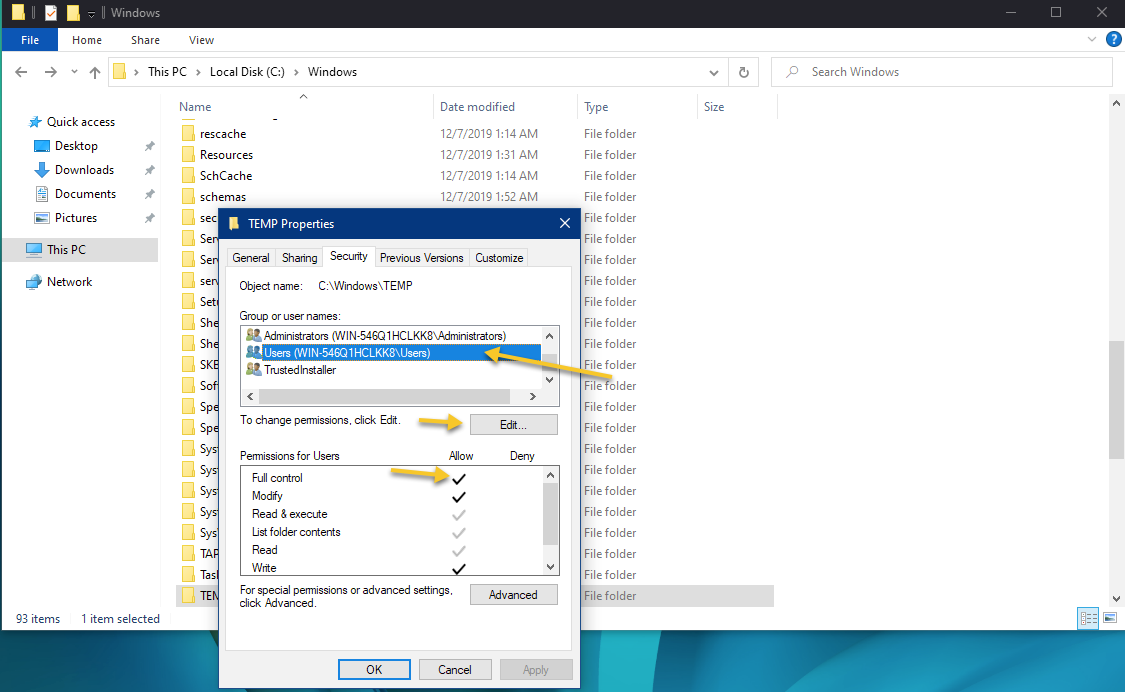
4. You can modify the Permissions by selecting the Group or user name from top list and clicking on the Edit button.
5. After ensuring that the correct permissions are set run the installer again.
Printer Test
Test your newly setup printers connected to Jazva's Print Server.
- From the main menu, click Setup and select Shipping -> Printers.
- Existing printers are listed and displayed. To test printing capability, click print icon (
 ) under the Test column, and your printer should start printing. See Figure 8.
 - If printer fails printing, refer to your printer configurations. For additional print server assistance, please contact Jazva support center.
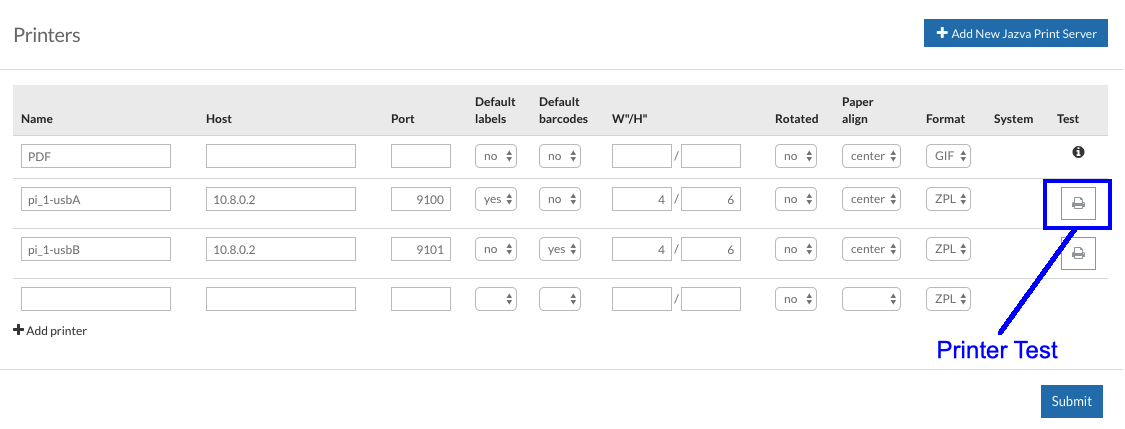
Figure 8
Thermal Label Printers
Specific printer designation for particular thermal label pick-list print jobs without altering default printer settings. This allows multiple print batches. Simultaneously, eliminating waiting period for one job printing completion.
To use this feature, enable "small pick-lists" under Global Settings -> Shipping. Next time you process a batch, click on Print drop-down list; resulting displaying available alternative printers.
Comments
0 comments
Article is closed for comments.