SET UP RAW PRINTING FOR PC
PRE-SETUP:
The zebra barcode printers do not come pre-loaded with ink or labels. Before setup, ensure that your printer has its ink ribbon and labels loaded.
STEP 1: set up your printer
See this article to set up your printer.
STEP 2: Plug your printer into the computer
Turn on your printer and then plug it into your computer using a USB cable. Your computer will auto-install drivers so it can communicate with the printer. This can take up to 10min. Wait for it to complete before moving on to the next step.
STEP 3: Install your printer on your system
-
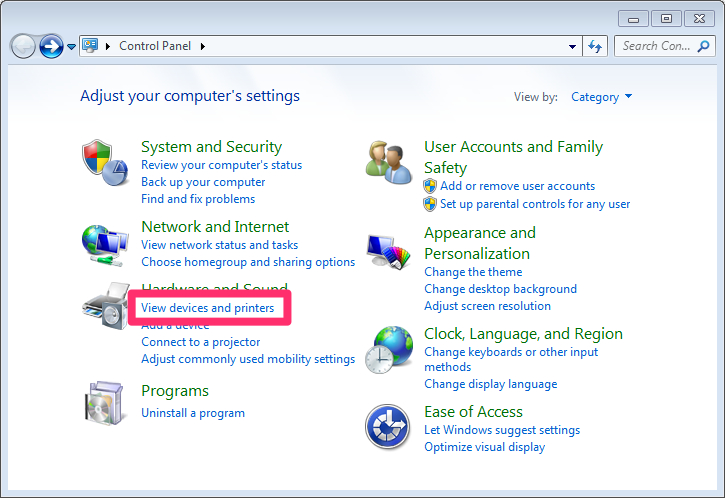
Open the Control Panel: "Devices and Printers"
-
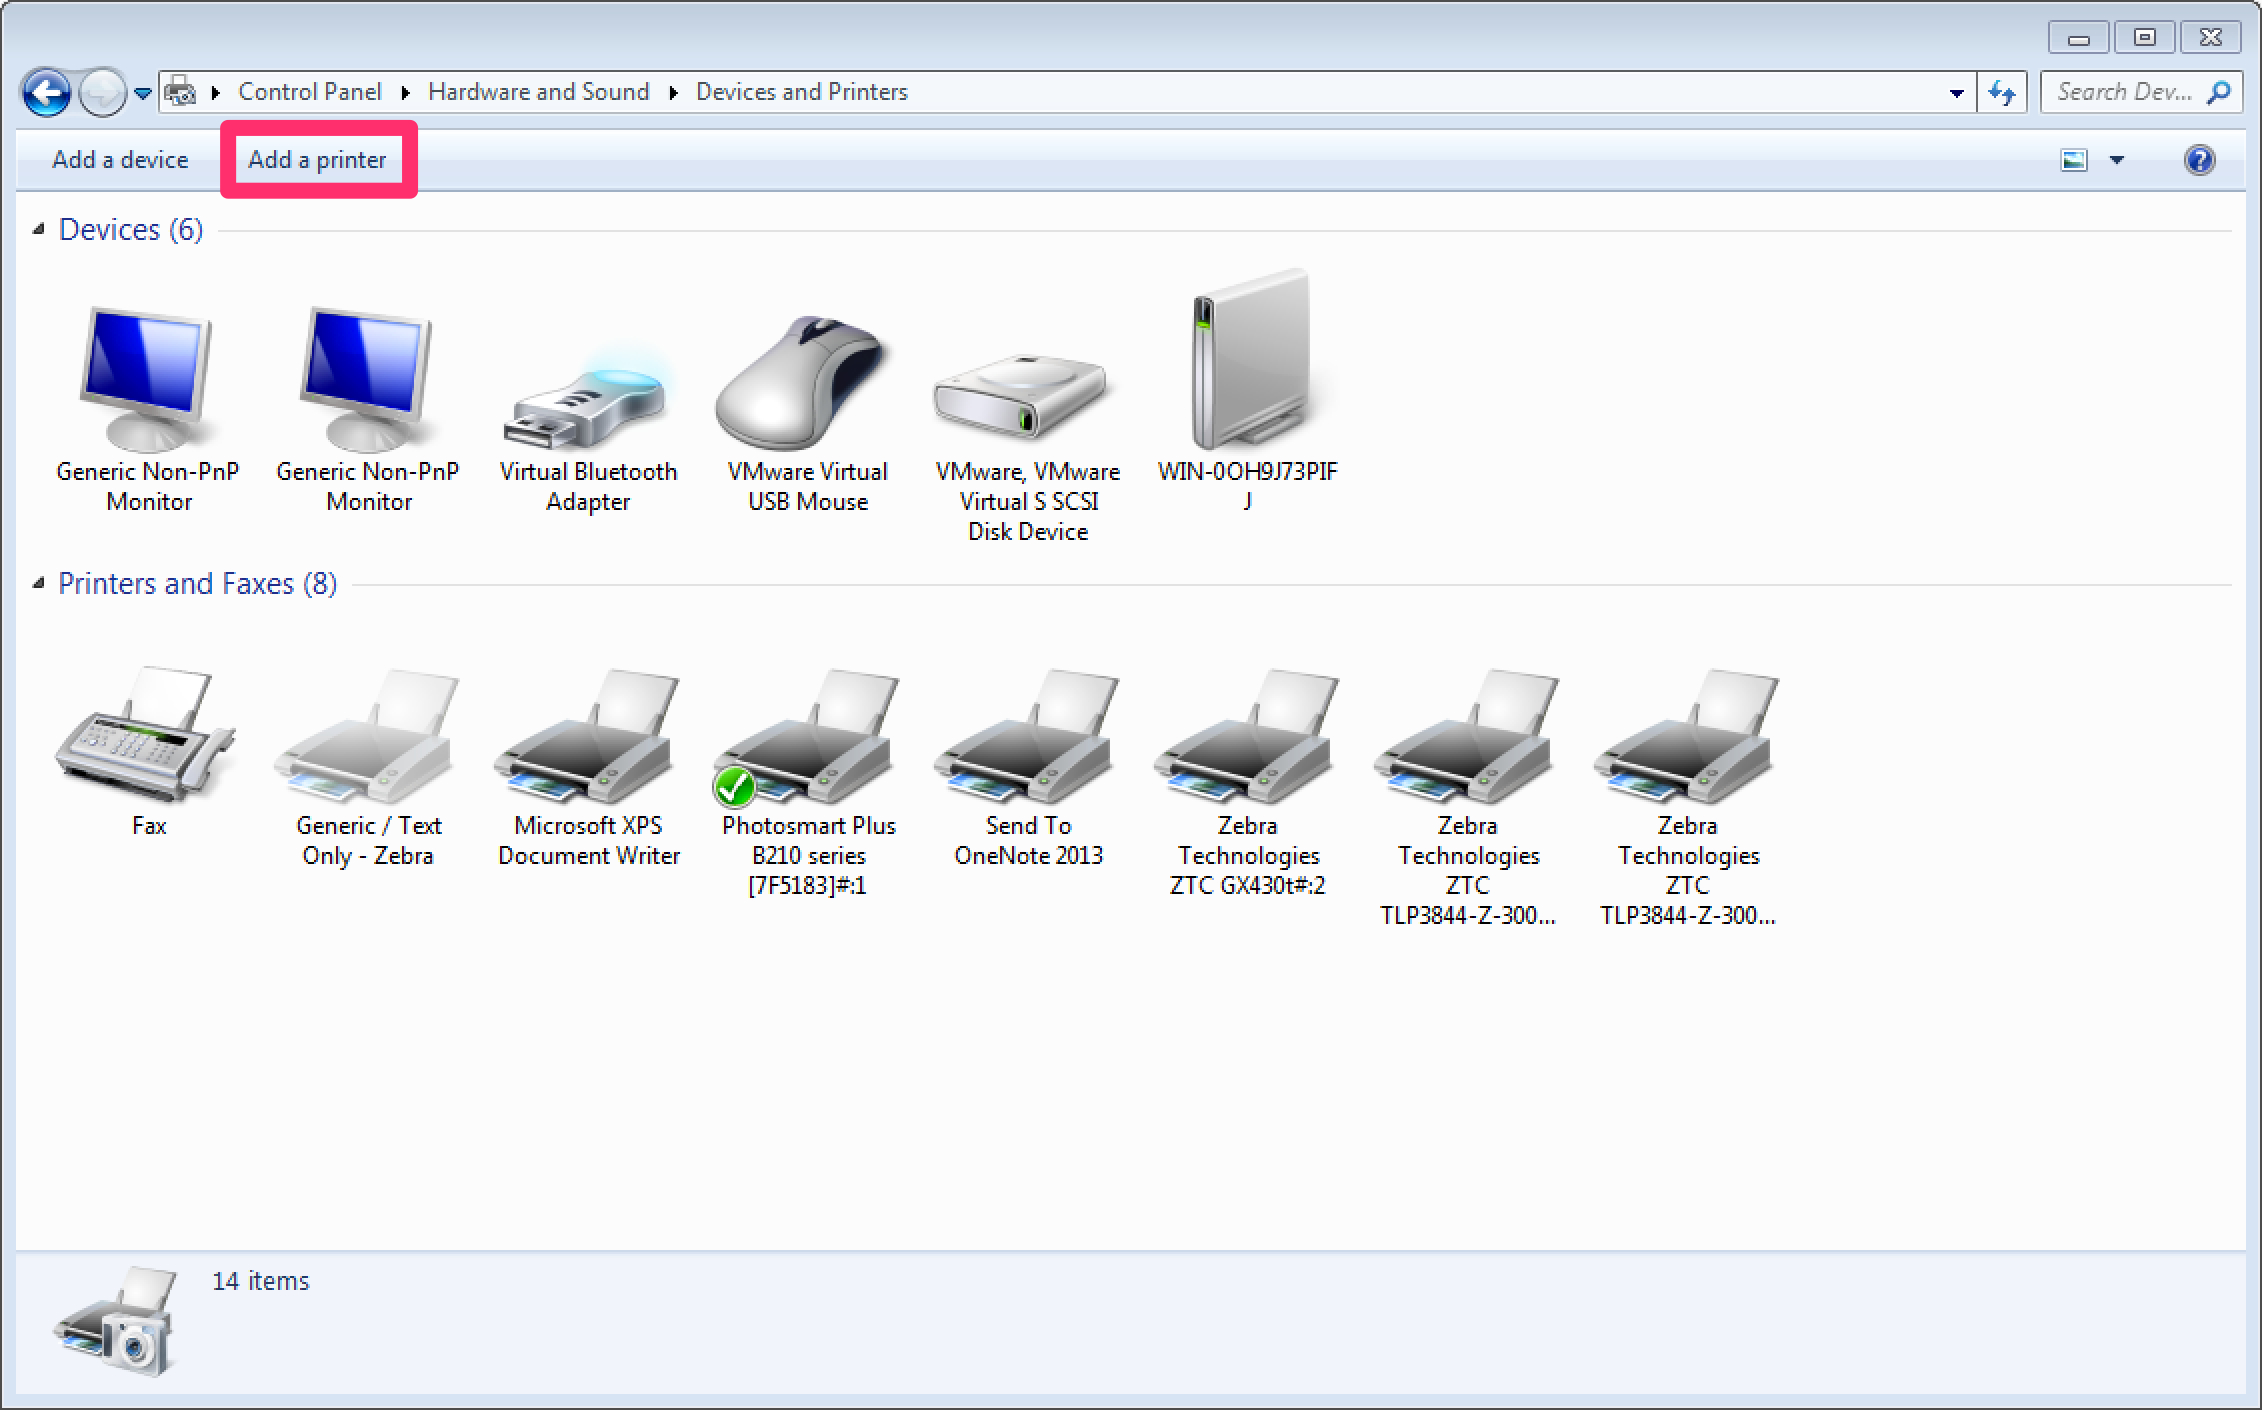
Click "Add Printer"
-
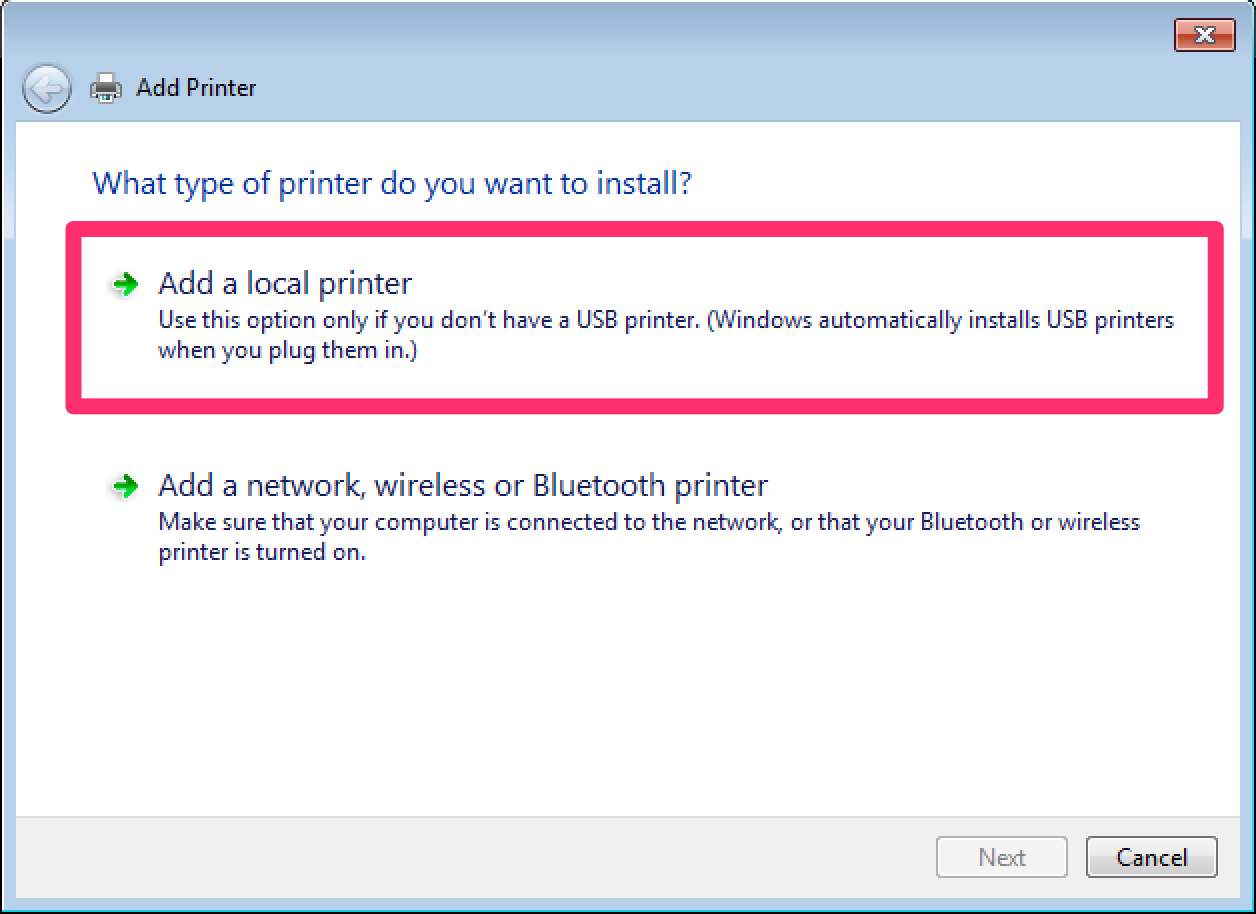
Select "Add a local printer"
-
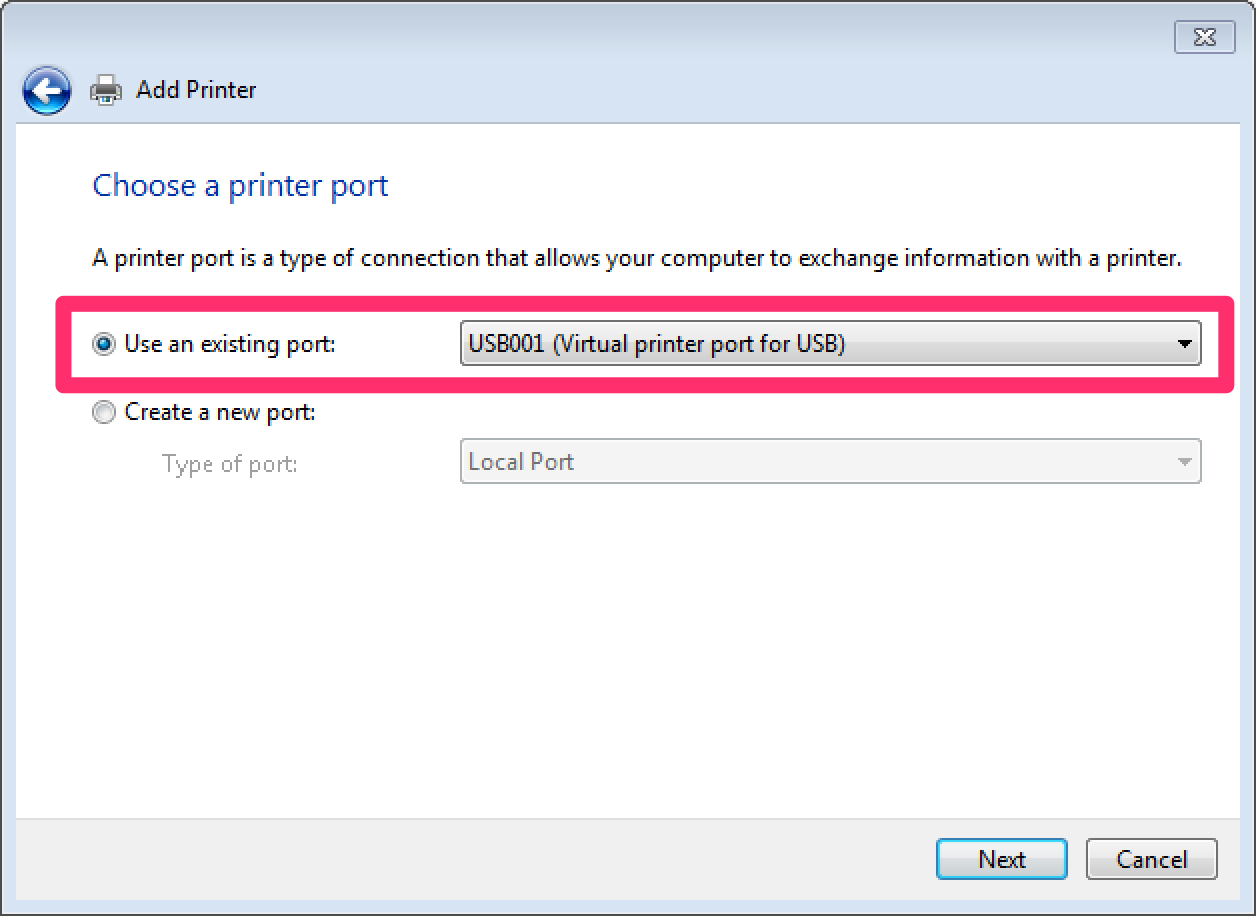
Select "Use an existing port:" and From the drop down menu pick the USB port. It should read "USB001 (Virtual printer port for USB)". It may be "USB002" or "USB003" depending on how many printers you already have connected via USB. Choose the highest value number as it will be the most recent virtual port created, and thus the one for the printer you just plugged in. Click Next.
-
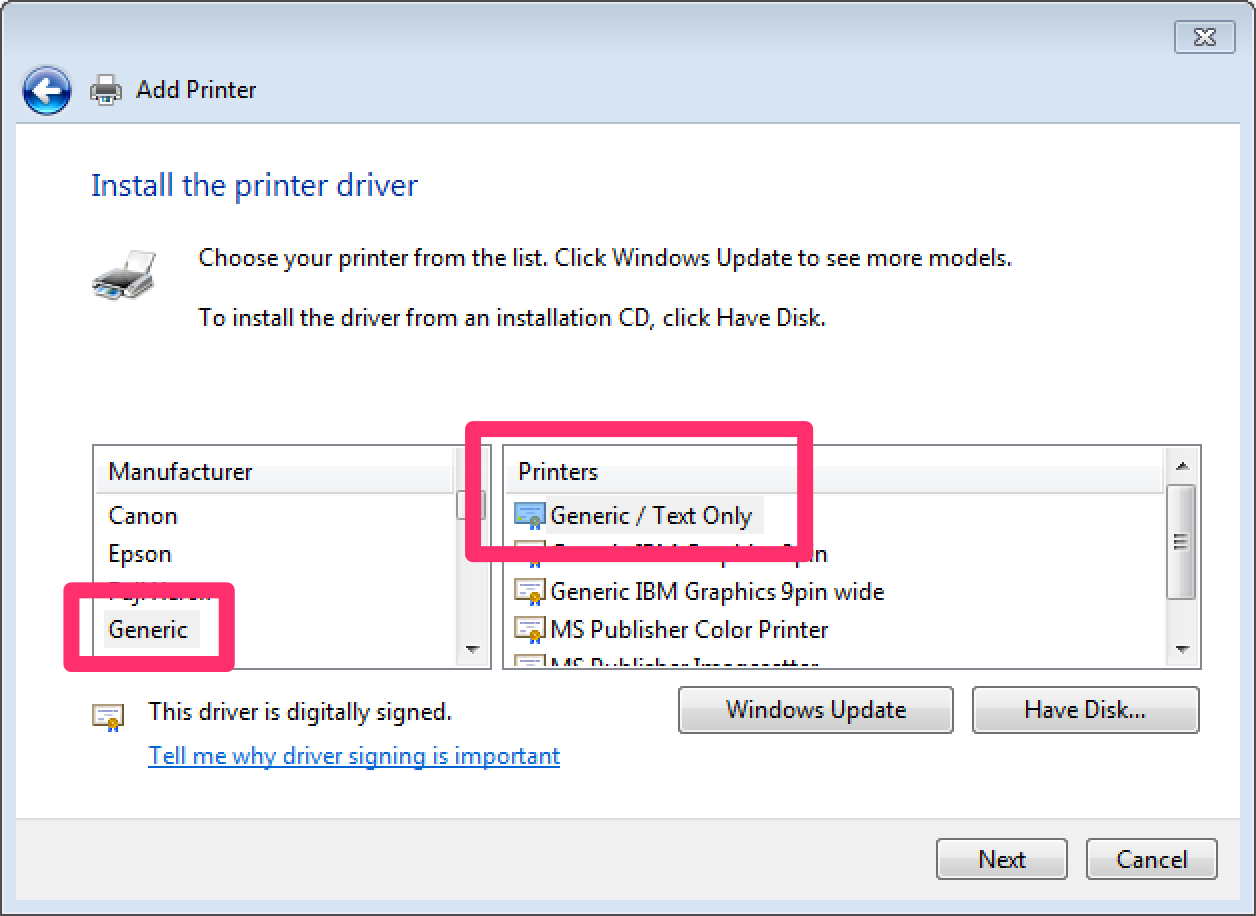
Select "Generic" from the Manufacturer choices. Then select "Generic /Text Only" from the Printers choices. Click Next.
-
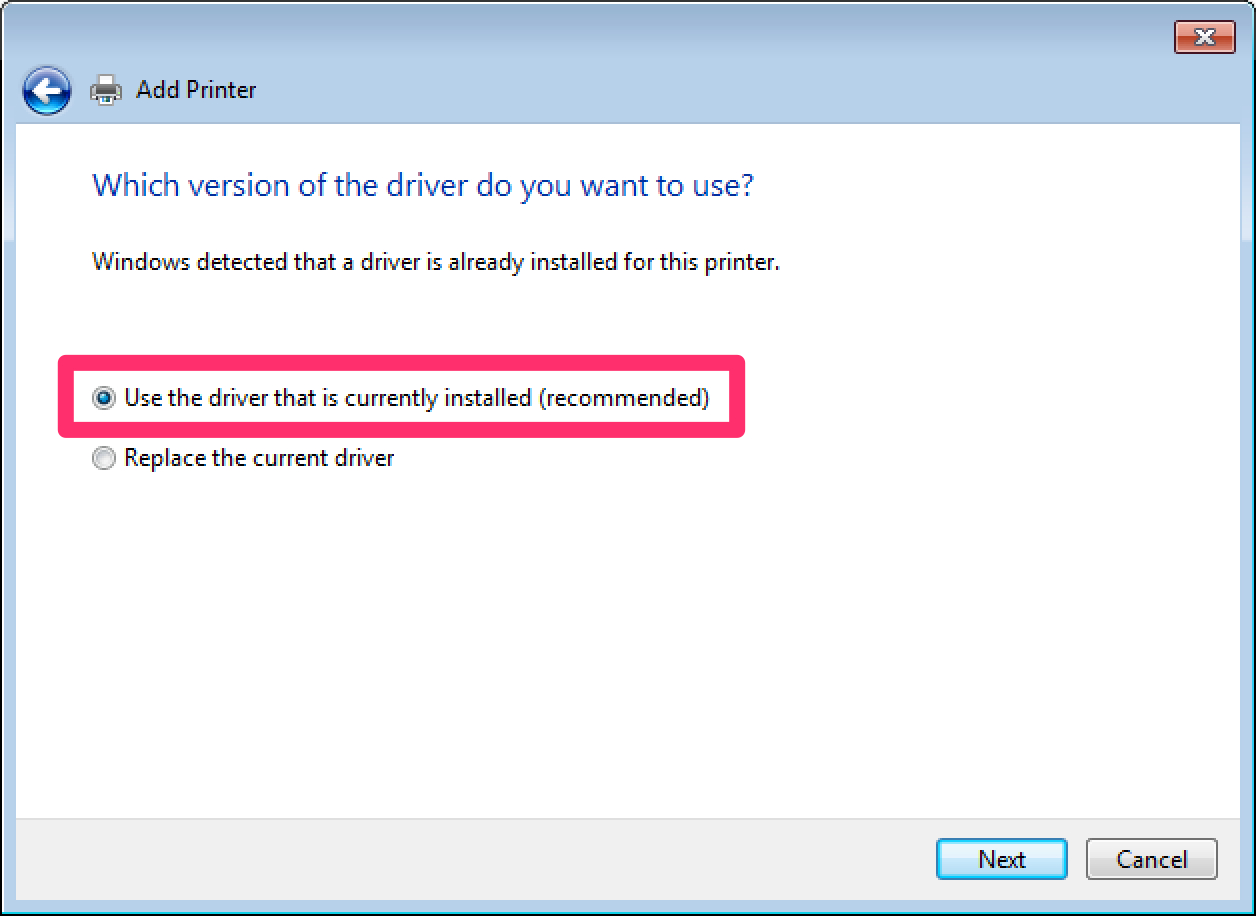
Select "Use the driver that is currently installed (recommended)". Click Next.
-
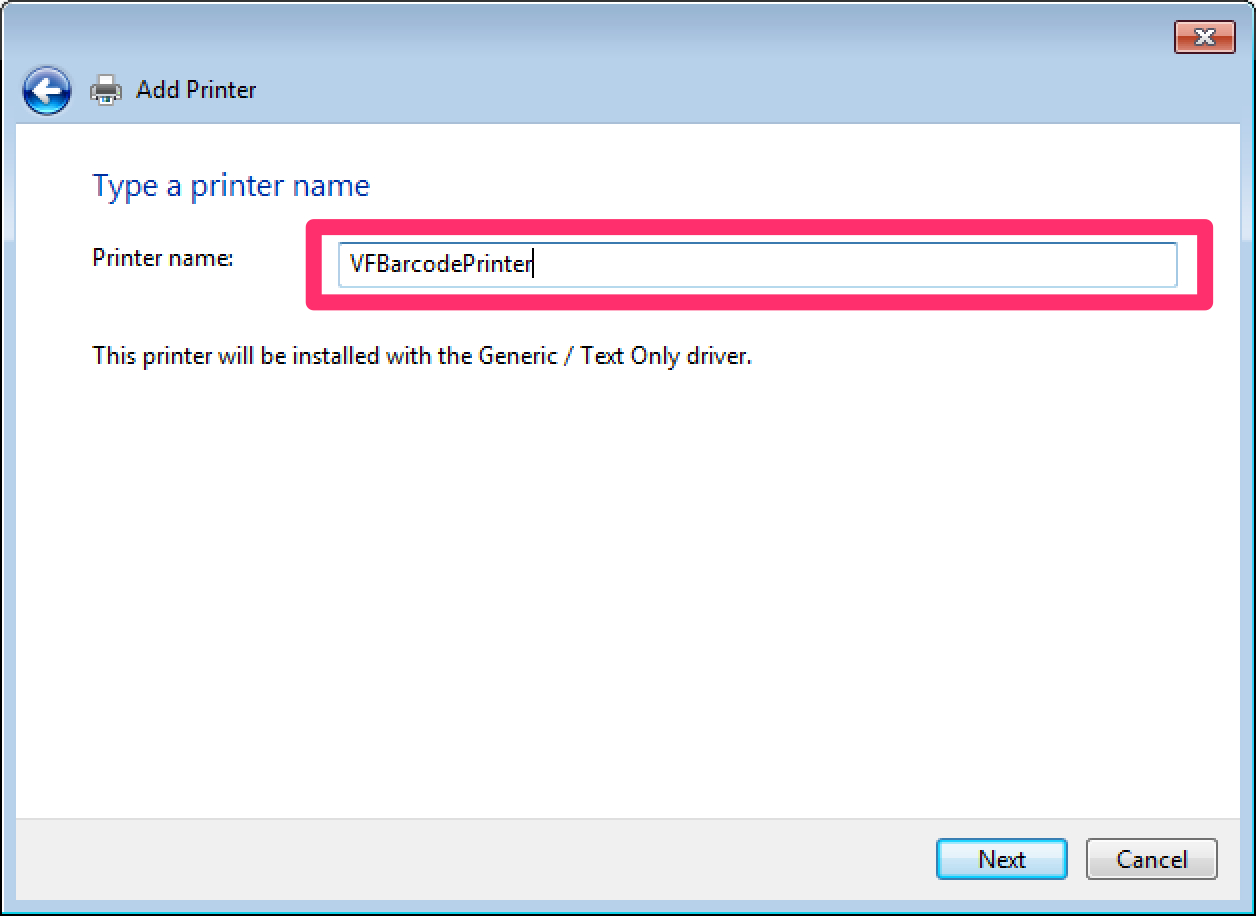
Name the Printer "VFBarcodePrinter" so you can identify it in the future. Click Next.
-
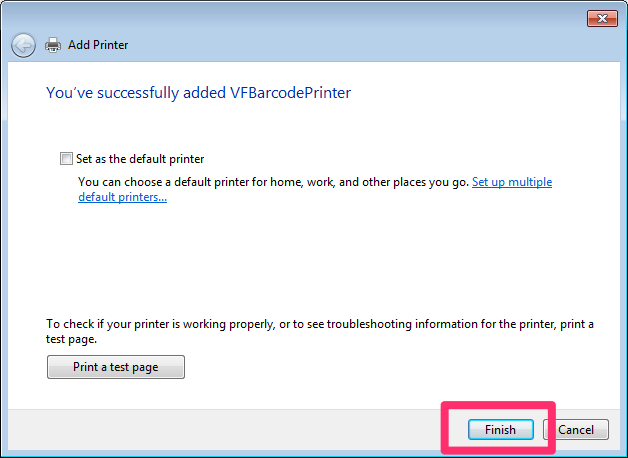
Set as default if this computer is set up to only print barcodes, otherwise leave it blank and click Finish.
-
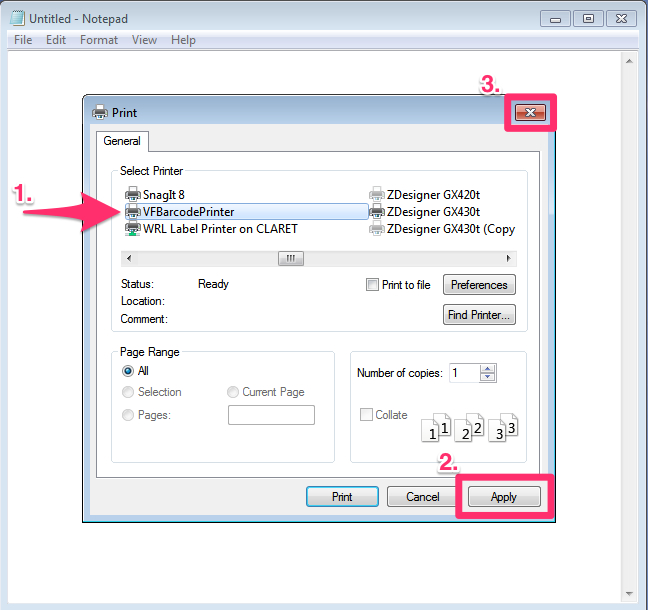
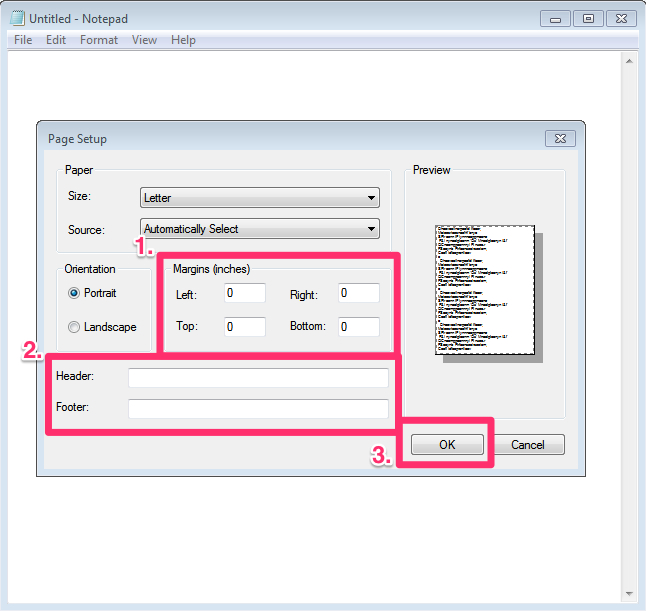
Open Notepad -First go to File > Print > Select the Printer, then go to File > Page Setup > Clear any Header or Footer AND set all margins to "0" - this step is important so that you can send the printer the pure printing instructions without extra formatting provided by Notepad.
Congrats! You are done, now do some testing.

Comments
0 comments
Please sign in to leave a comment.