Contents:
- Overview
- Preparing Your WooCommerce Store
- Setting Up a New WooCommerce Channel in Jazva
- Configuring Your WooCommerce Channel Settings
Overview
Integrating your WooCommerce channel is a two-step process, which involves:
- Preparing your WooCommerce store for integration by enabling the REST API on WooCommerce’s side and generating API Keys.
- Setting up the WooCommerce channel in Jazva.
Note: Jazva currently supports WooCommerce 3.2.6 and later.
Preparing Your WooCommerce Store
You can prepare your store for integration by following these steps.
1. Log into your Wordpress dashboard.
2. Navigate to WooCommerce and select Settings.
3. Switch to the API tab.
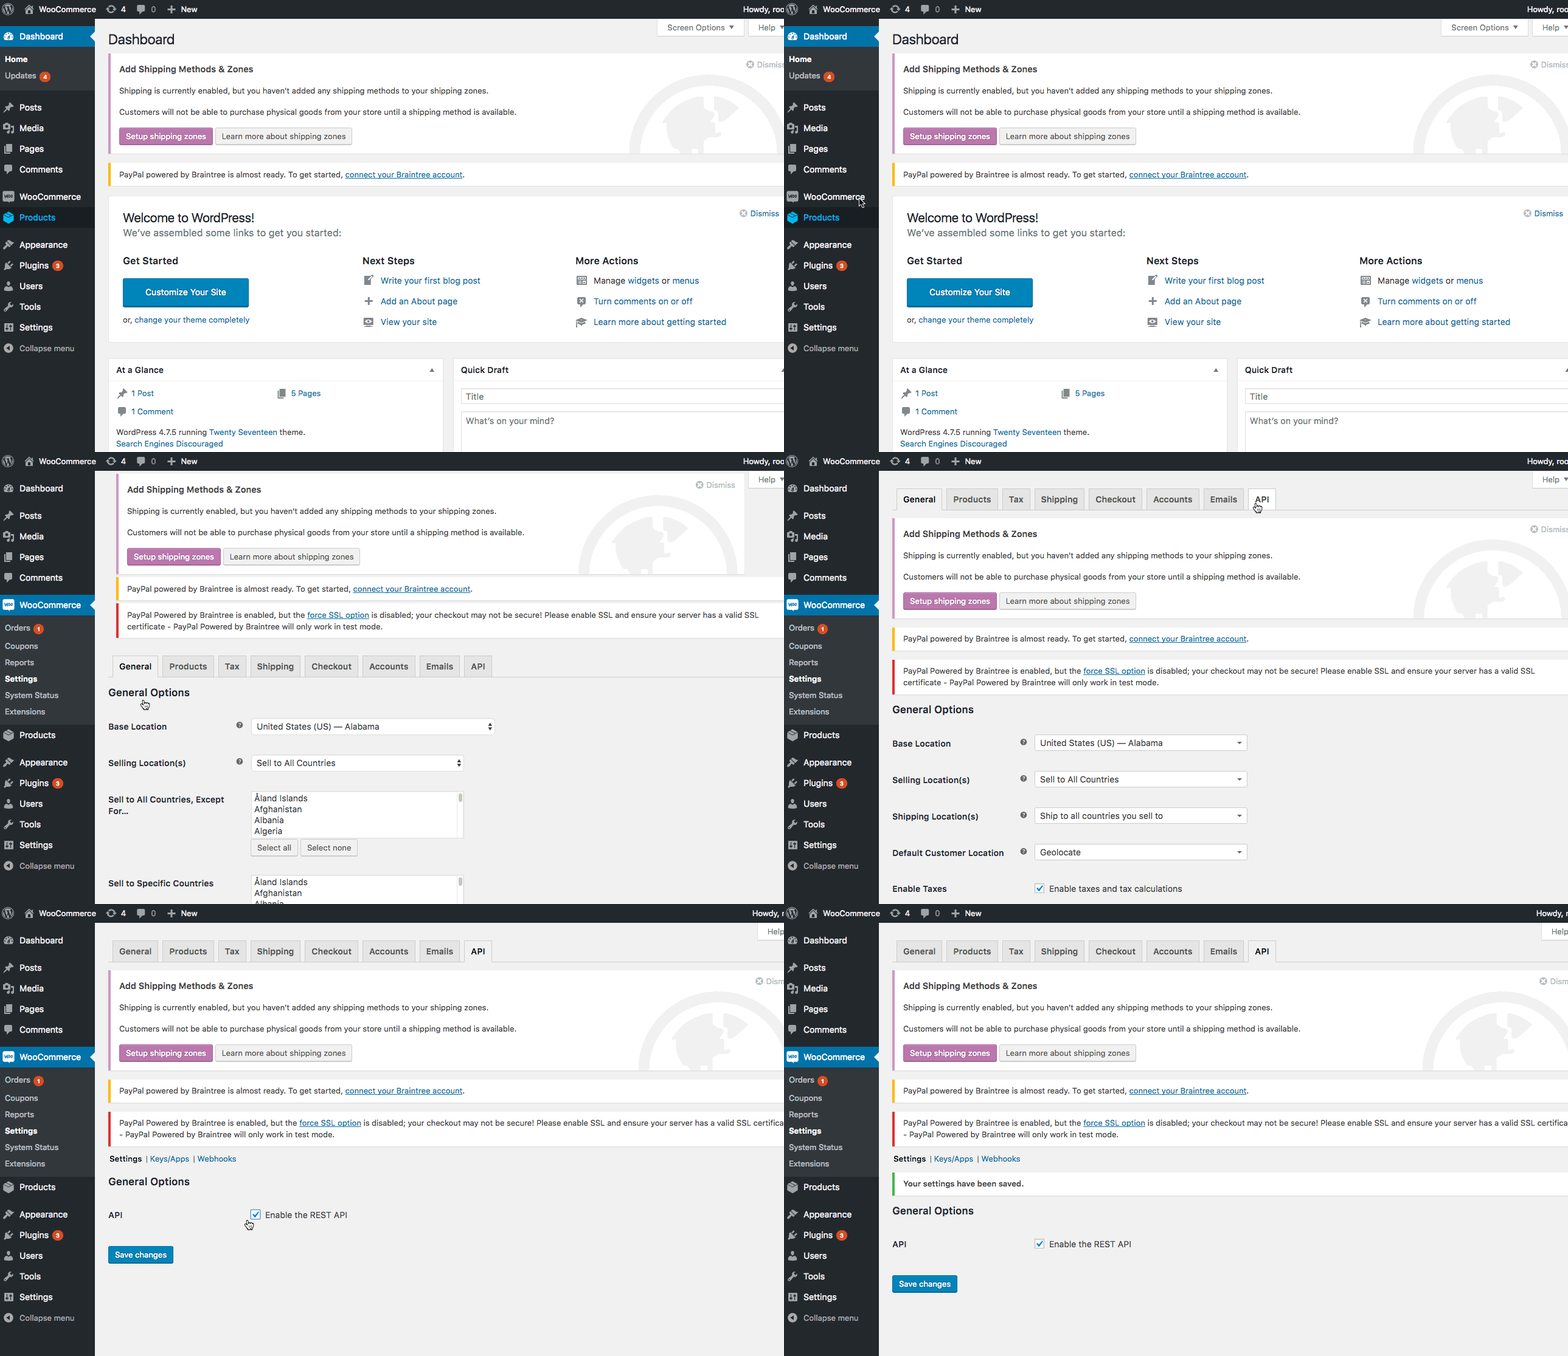
4. Mark the Enable REST API checkbox, and click Save Changes.
5. Navigate back to Wordpress and go to Settings > Permalinks.
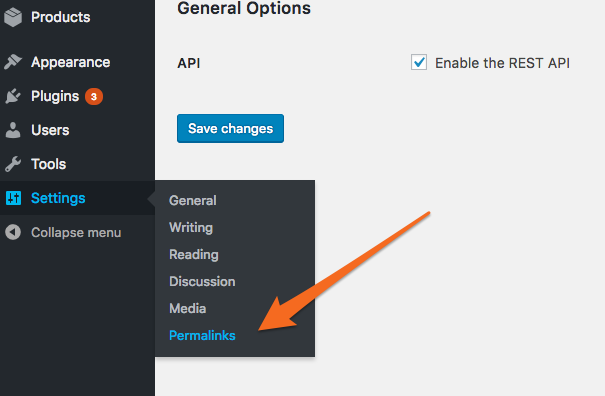
6. Turn on Permalinks. You can choose any permalink format for your products.
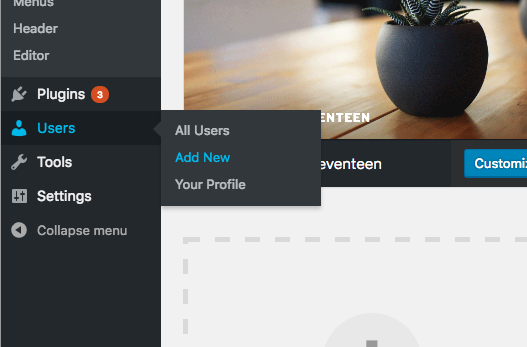
7. Navigate to Users and select Add New.
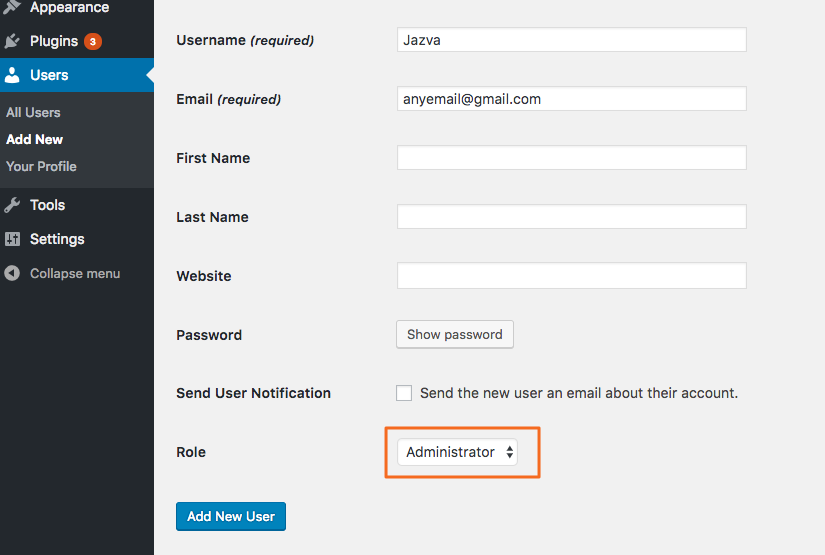
8. Create user “Jazva” on Wordpress. Set the Role to Administrator. Click Add New User.
9. Navigate back to WooCommerce > Settings.
10. Switch to the API tab and select Keys/Apps.
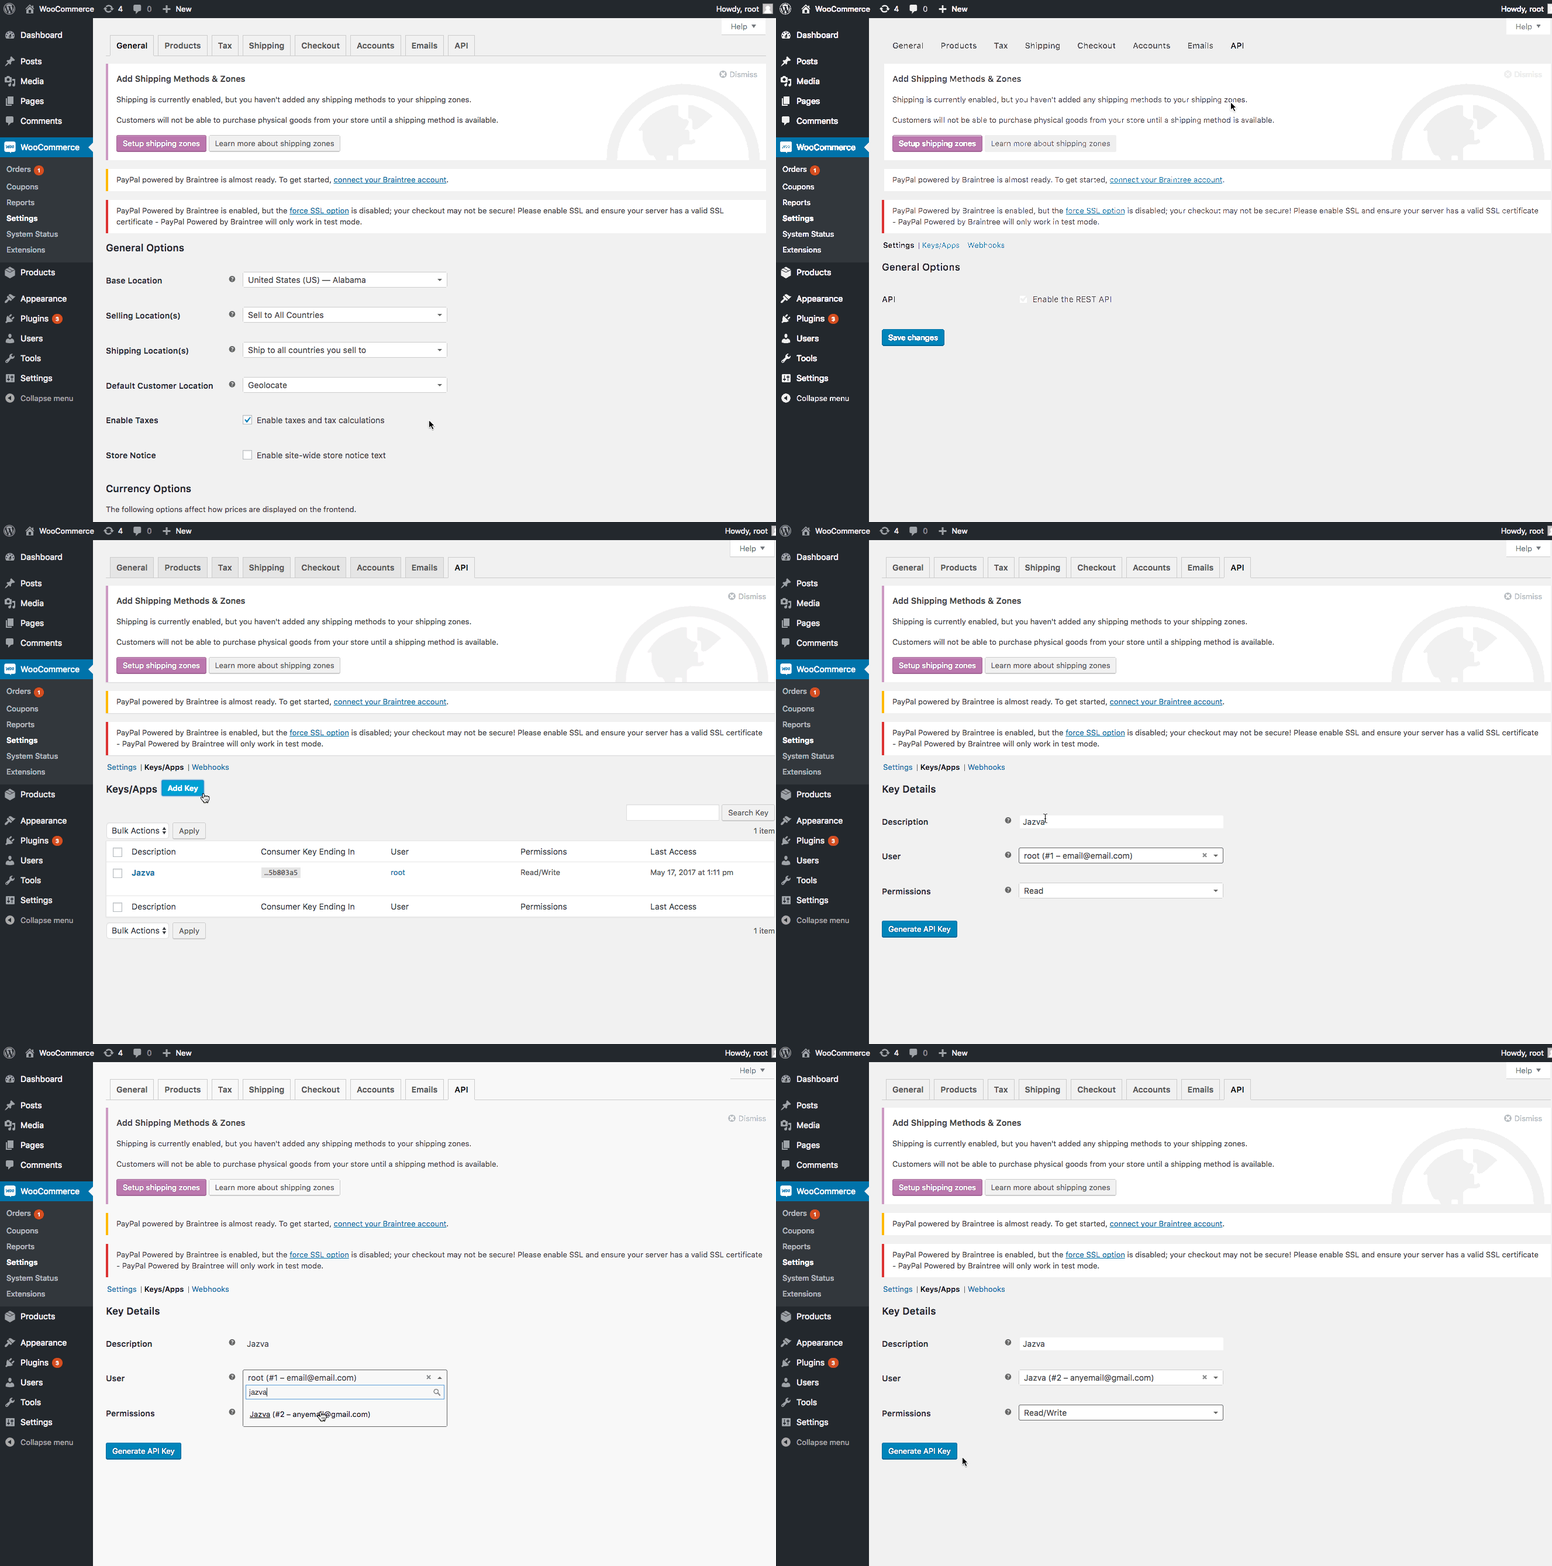
11. Select Add Key.
12. Add any Description. We recommend “Jazva” for easy identification.
13. For User, look for the Jazva user you recently created.
14. For Permissions, choose Read/Write access.
15. Click Generate API Key.
Now that keys have been generated, you should see two new keys, a QRCode, and a Revoke API Key button.

These two keys are your Consumer Key and Consumer Secret, needed for WooCommerce channel setup in Jazva.
IMPORTANT: These keys must be copied at this point. You will not be able to access these again.
Setting Up a New WooCommerce Channel in Jazva
- From the main menu, go to Setup and select Channels.
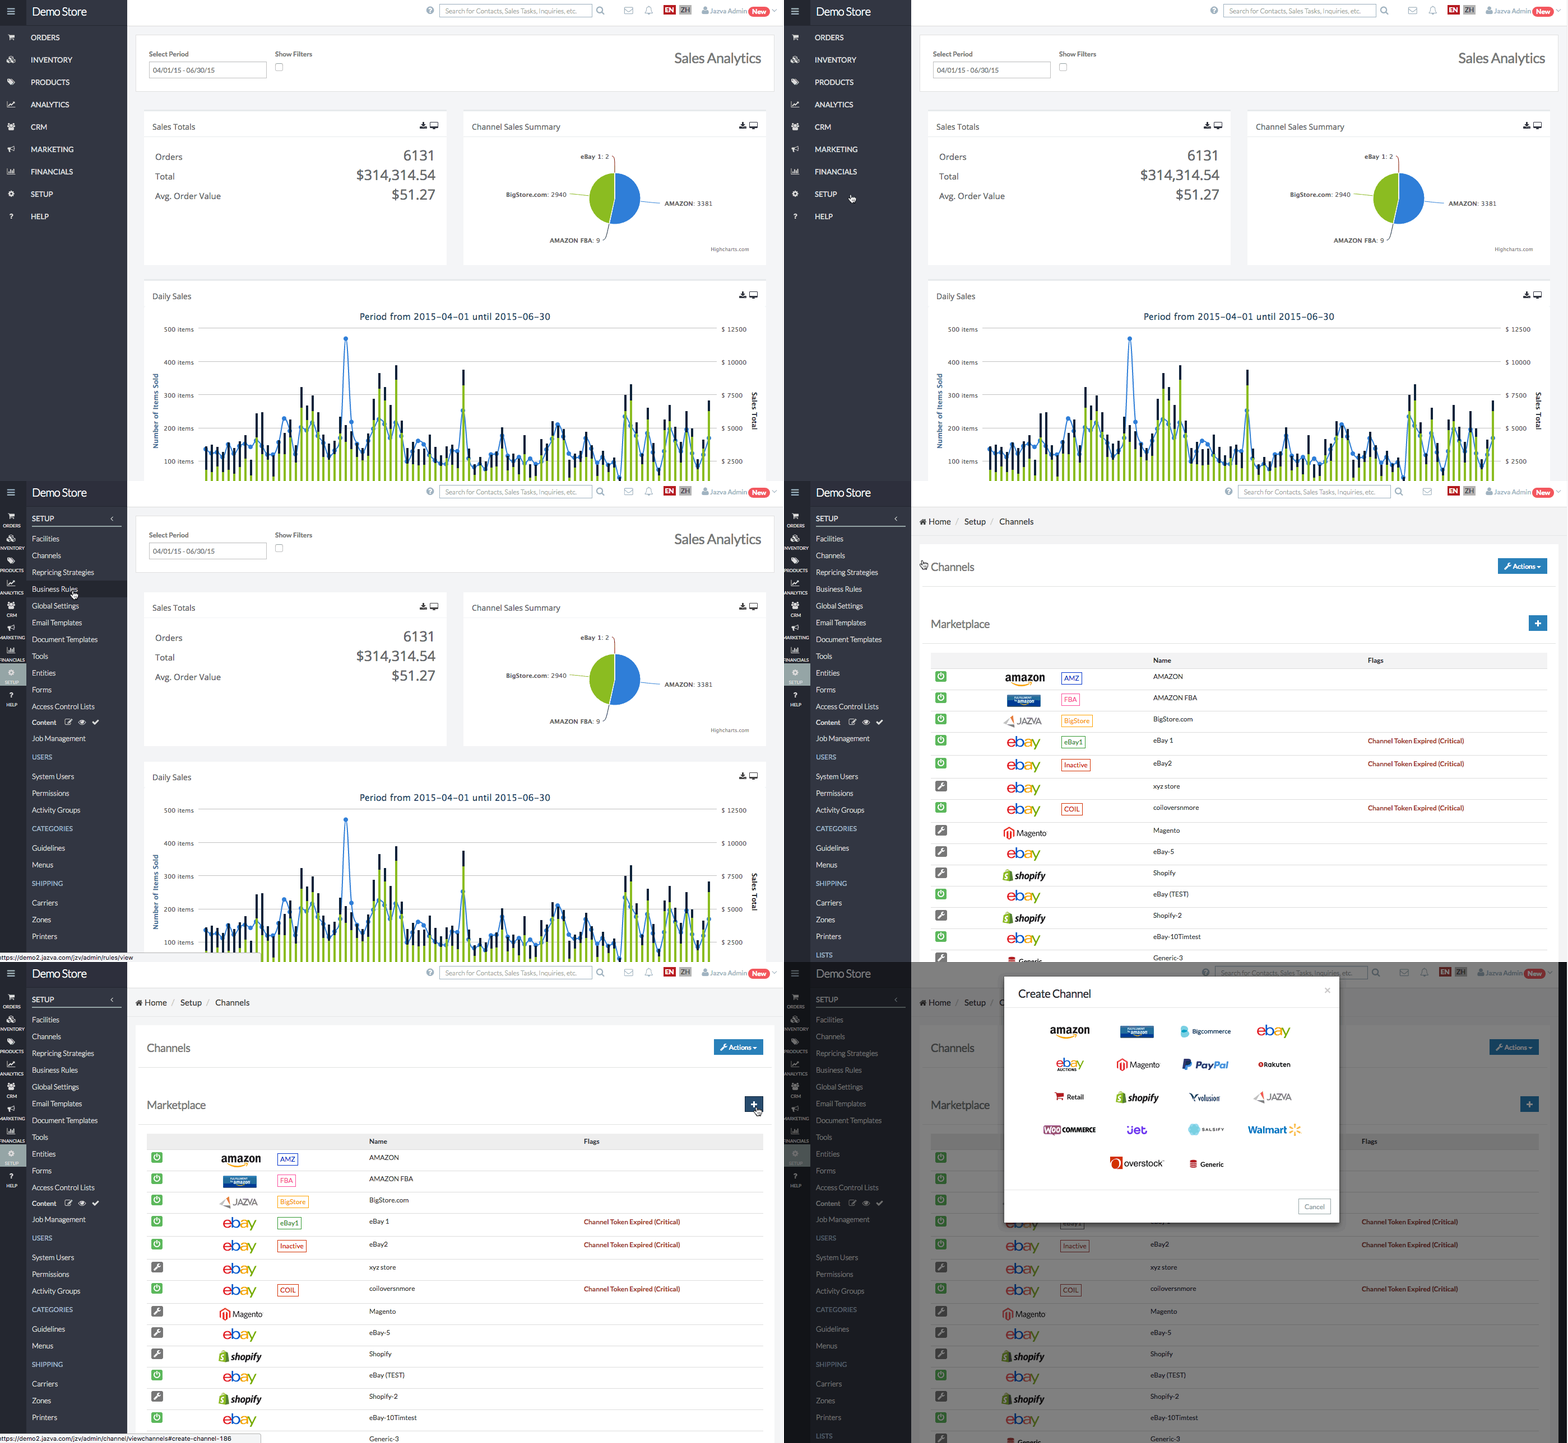
- From the Marketplace section, click the + icon and select WooCommerce.
- Complete the required fields and options for the Channel Config wizard:

- Channel Name – Give the channel a name.
- Channel Code – Give the channel a personalized code for reference.
- Parent Web Channel – sets a channel to be the basis of default settings of the channel. The parent web channel needs to be activated in order to show in the dropdown menu.
- Enter your Return Address information.
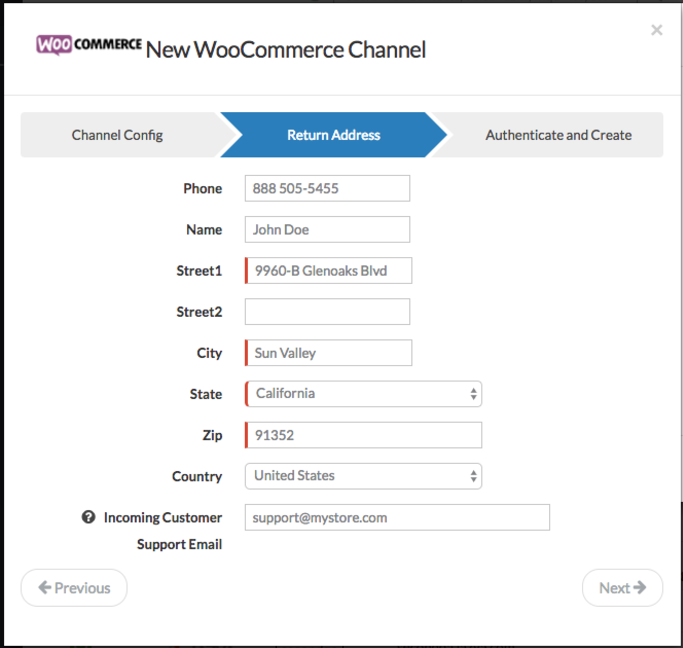
- Complete the Authenticate and Create section:
- Process Orders From - set a date from which orders should be imported. The proper format is military time, so 23:11 would be 11:11 PM, for example.
- Consumer Key - this is an API key generated from your WooCommerce account.
- Consumer Secret - this is an API key generated from your WooCommerce account.
- Base Store URL – the domain of your site. For example “http://mybigstore.com”
- Click Create Channel to finish.
The channel will be listed under the Marketplace section of the Channels page.
Configuring Your WooCommerce Channel Settings
Jazva offers a wide range of options you can update to finetune your channel. Many of these settings are optional, but we recommend you review every single option available on the Setup tab.
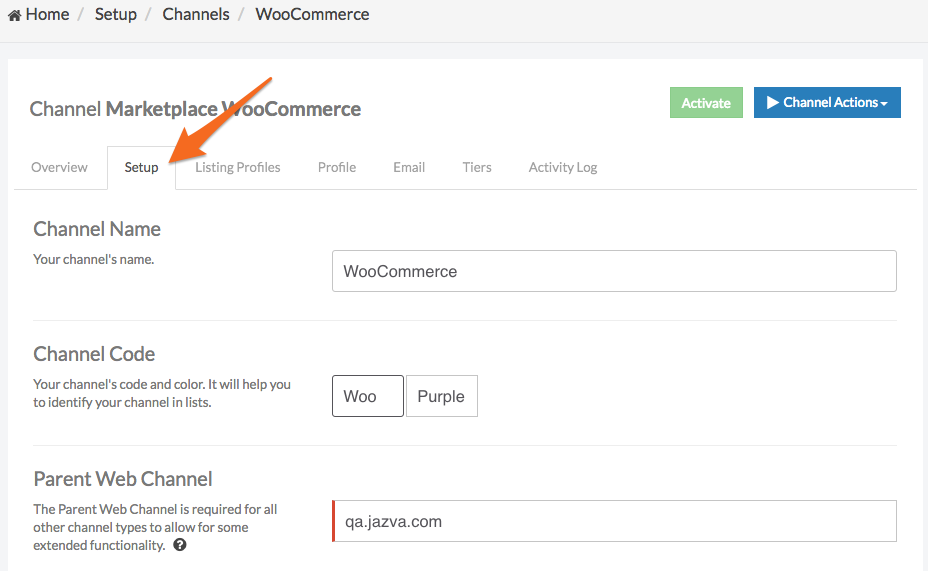
- Complete or update the following settings as needed:
- Import Orders - this setting activates the importing of orders and sets which types of orders will be included.
- Process Orders From - set a date from which orders should be imported.
- Last Order Sync Date - Jazva will pull order data from all orders from after this date.
- Maximum Inventory – sets a maximum monetary amount of inventory to be published to the channel per SKU. For example, the limit is set at $3,000 and a SKU that is sold for $40 has an inventory on hand of 220pcs. Jazva will only publish 75 pieces to the channel (75 x $40 = $3,000).
- Maximum Inventory Count – sets a maximum unit amount of inventory to be published to the channel.
- Import Customers with Orders - New CRM contacts will be created along with your orders.
- Channel Merging Priority - this setting applies only when merging products from two or more channels. Enter a number to define the priority of this channel when merging products. The higher the number, the higher the chance that products from this channel will be selected as the main product when merging.
- Base Store URL - the domain of your site. For example “http://mybigstore.com”
- Import Listings - imports all products from the channel and sets its frequency.
- Publish Listings - select how you would like Jazva to publish and update your listings. This option will not affect inventory updates.
- Consumer Key - this is an API key generated from your WooCommerce account.
- Consumer Secret - this is an API key generated from your WooCommerce account.
- Image Option - sets a default size to the images published on the channel.
- Enable Email Communications for This Channel - Activating this setting will allow emails to be sent out from this channel.
- Base Category – sets the root category for importing products and mapping other categories.
- Jazva Billing Code - billing code for internal use
- Sandbox – sets the channel on sandbox mode. This needs to be unchecked to set the channel active.
- Channel Owner – sets a designated owner of the channel.
- Click Update to save.
- Click the Profile tab and update the pertinent contact and shipping information.
- Select eligible Shipping Carriers for the channel. We recommend checking All Carriers, so that Jazva can autoselect the least expensive shipping method and carrier from all your set options.
- Click Save and return to the channel’s Setup tab.
- Click Activate and the channel will be live.
Comments
0 comments
Please sign in to leave a comment.